Part 1: Getting Started
Introduction
Welcome to WHMAZ, a lightweight domain hosting management system designed specifically for hosting and service providers. This guide will help you understand and utilize all features of the system effectively.
Live Demo
Try WHMAZ before installing:
| Portal | URL | Password | |
|---|---|---|---|
| Admin | demo.whmaz.com/whmazadmin | admin@whmaz.com | Abcd.1234 |
| Client | demo.whmaz.com | client@whmaz.com | Abcd.1234 |
What is WHMAZ?
WHMAZ is a complete business management solution that provides:
- Client Portal for customers to manage their services, domains, and support tickets
- Admin Portal for business owners to manage customers, orders, billing, and support
- Billing System with automated invoicing and payment processing
- Domain Management with registrar API integration
- Support System with ticketing and knowledge base
- Reporting & Analytics for business insights
Who Should Use This Guide?
This guide is for:
- Administrators/Business Owners - Part 3 & Part 4
- Customers/End Users - Part 2
- Technical Staff - All Parts
- Support Personnel - Part 2 & Part 3 (Support sections)
System Overview
System Architecture
WHMAZ consists of two main portals:
- Customer Portal (Client Area)
- URL:
https://yourdomain.com/auth/login - Purpose: Self-service portal for customers
- Features: Orders, domains, invoices, tickets, knowledge base
- URL:
- Admin Portal (Management Area)
- URL:
https://yourdomain.com/whmazadmin/authenticate/login - Purpose: Business management and administration
- Features: Complete system control and configuration
- URL:
Quick Start Guide
For Administrators
- Access Admin Portal
- Navigate to:
https://yourdomain.com/whmazadmin/authenticate/login - Login with admin credentials
- Navigate to:
- Complete Initial Setup
- Configure company settings
- Set up email configuration
- Configure payment gateways
- Create hosting packages
- Set domain pricing
- Create First Customer
- Go to Customers → Add Customer
- Fill in customer details
- Save customer record
- Create First Order
- Go to Orders → New Order
- Select customer and package
- Generate invoice
- Process payment
For Customers
- Register Account
- Visit customer portal
- Click "Register"
- Complete registration form
- Verify email
- Place Order
- Browse available packages
- Select desired package
- Complete checkout
- Make payment
- Manage Services
- View orders in dashboard
- Access service details
- Request upgrades/changes
- Renew services
Accessing the System
Customer Portal Access
URL Format:
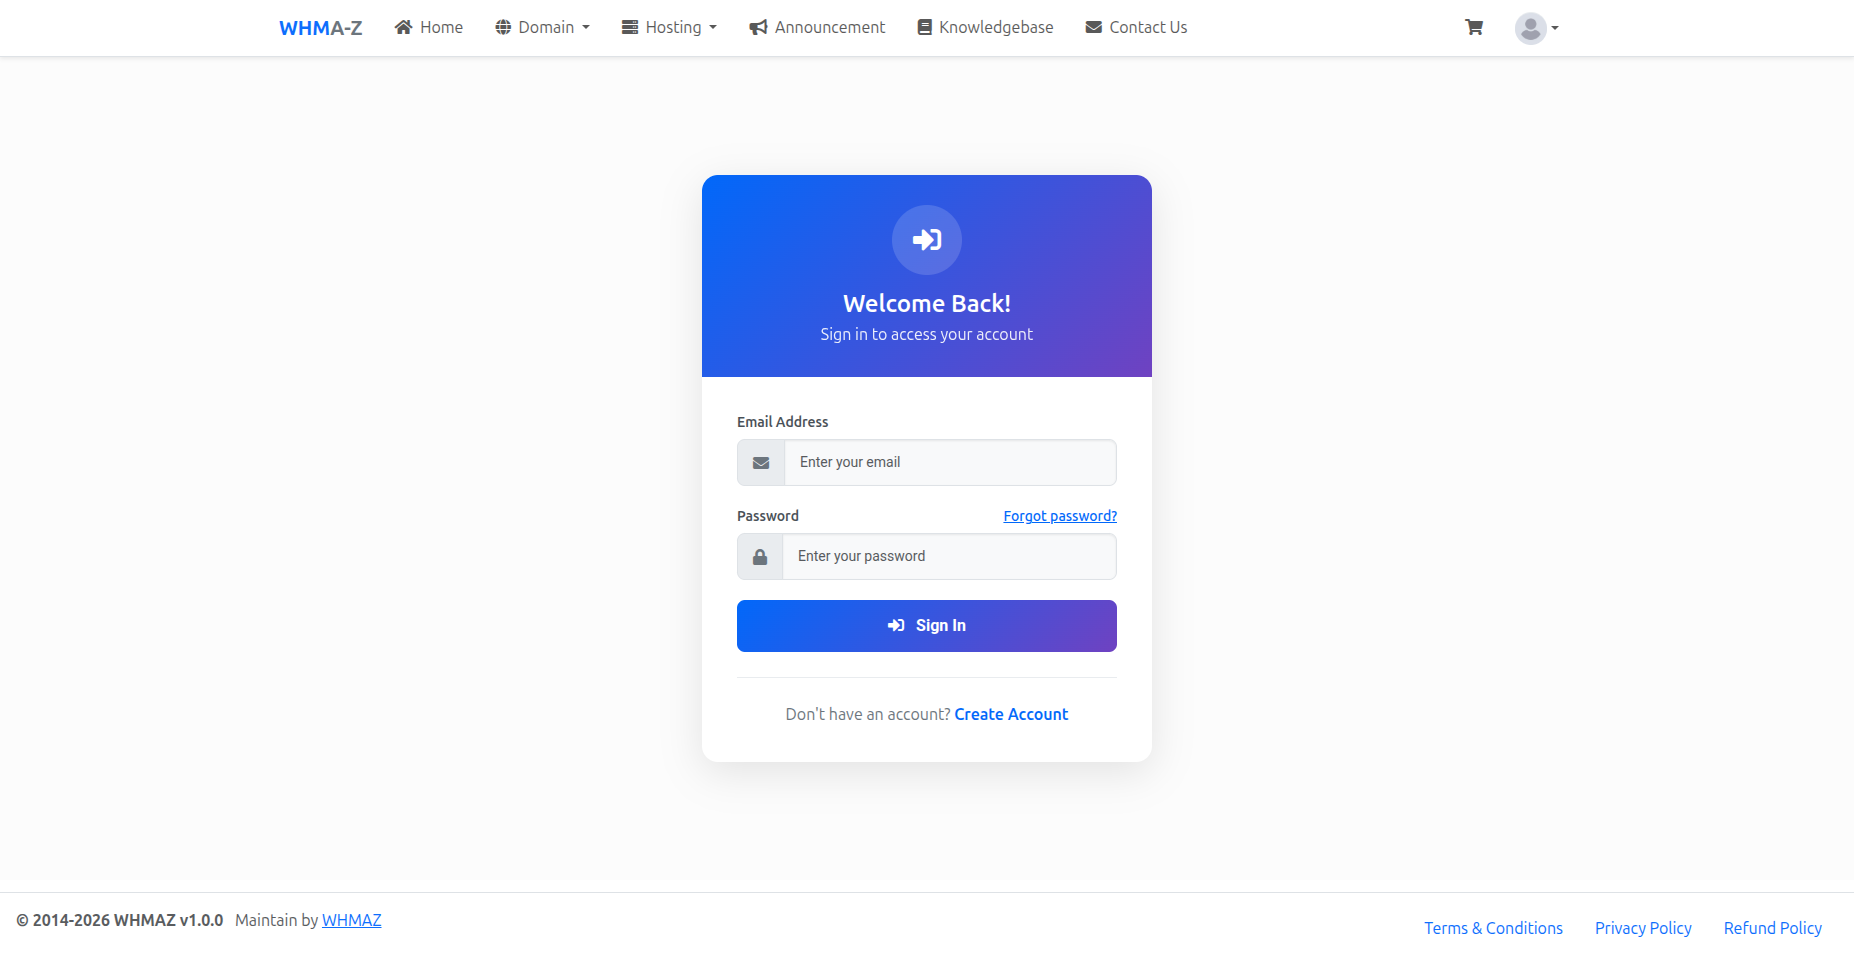
https://yourdomain.com/auth/loginLogin Page Elements:
- Email address field
- Password field
- "Remember Me" checkbox
- "Forgot Password?" link
- "Register" link for new customers
Admin Portal Access
URL Format:
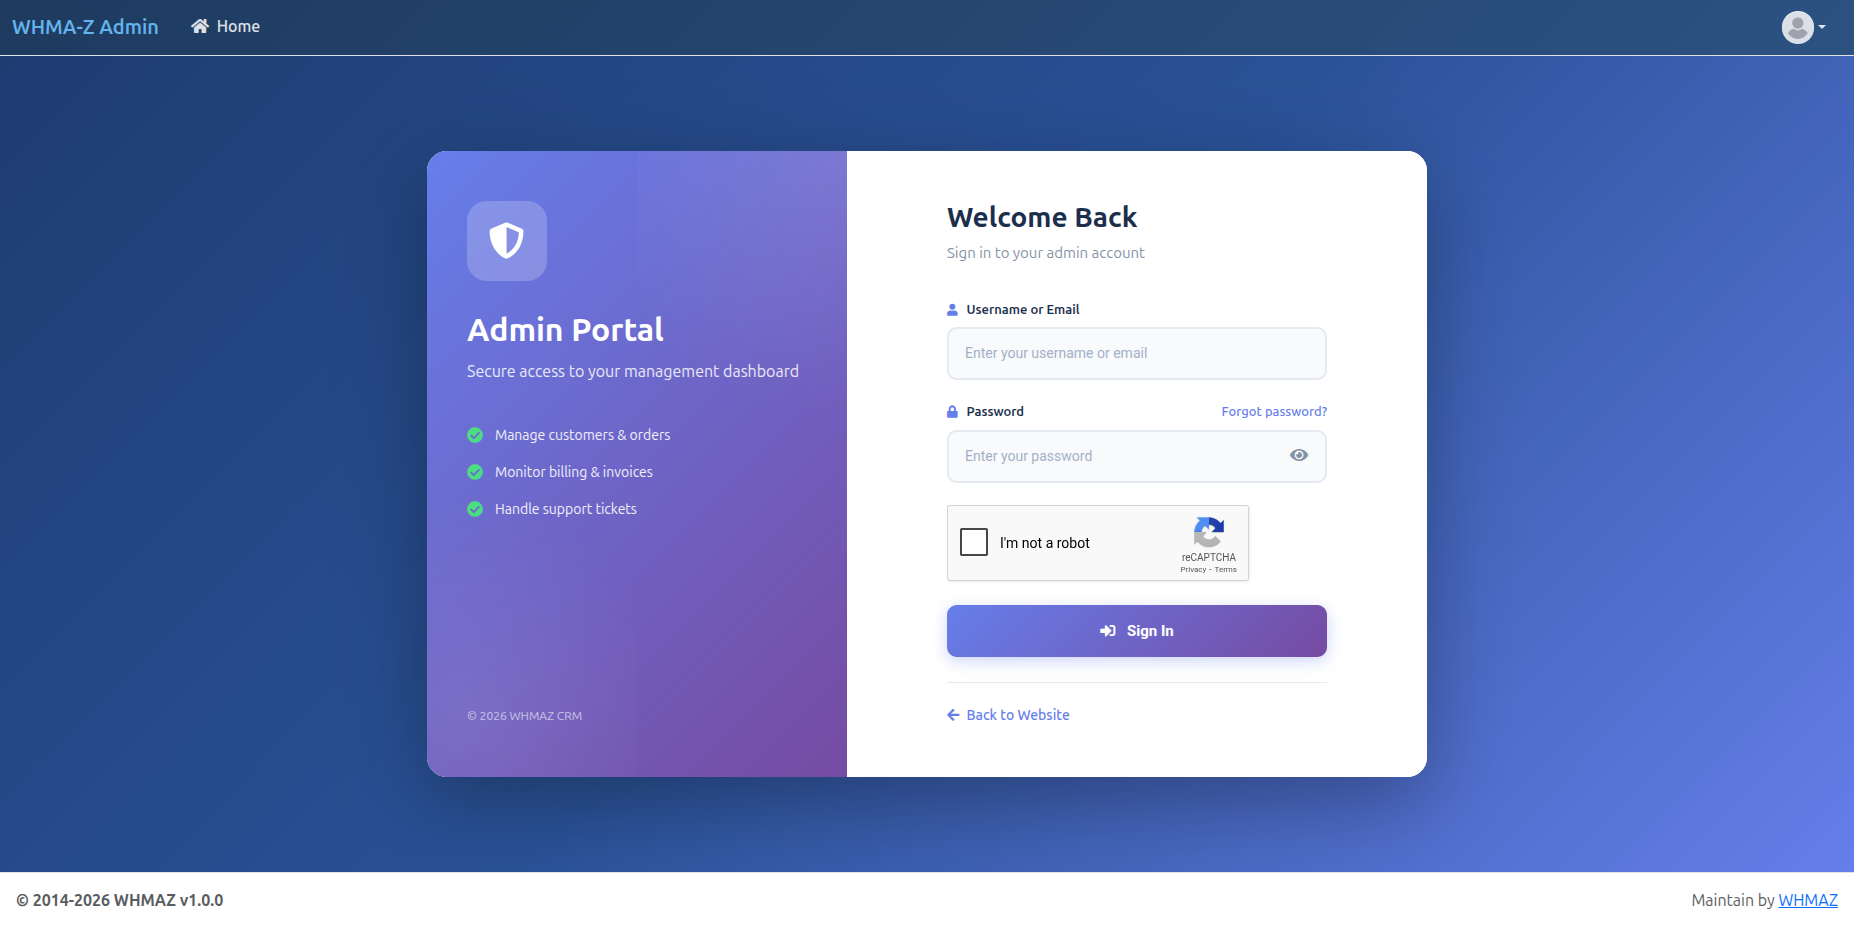
https://yourdomain.com/whmazadmin/authenticate/loginLogin Page Elements:
- Email address field
- Password field
- Google reCAPTCHA checkbox (if configured in General Settings)
- "Forgot Password?" link
reCAPTCHA Protection:
If Google reCAPTCHA is configured in the admin General Settings, the admin login page will display a reCAPTCHA checkbox to prevent automated brute force attacks. Complete the "I'm not a robot" verification before clicking Sign In.
Security Features
- CSRF Protection: All forms protected against cross-site request forgery
- XSS Prevention: All outputs sanitized
- Session Security: Secure session management with database storage
- Password Security: bcrypt hashing with strong password requirements
- Login Attempt Limiting: Protection against brute force attacks
- Google reCAPTCHA: Bot protection on registration and admin login pages
Default Credentials
Demo Installation
If you installed with demo data, use these credentials:
Administrator:
Email: admin@whmaz.com
Password: Abcd.1234
Demo Customer:
Email: client@whmaz.com
Password: Abcd.1234
Fresh Installation
If you installed without demo data:
Administrator:
- Email: (set during installation)
- Password: (set during installation)
IMPORTANT SECURITY STEPS
After first login, immediately:
- Change Default Password
- Go to Profile Settings
- Click "Change Password"
- Use strong password (min 8 characters, mixed case, numbers, symbols)
- Update Admin Email
- Ensure admin email is your actual business email
- Used for important system notifications
- Delete Demo Users (if applicable)
- Remove demo customer accounts
- Remove demo admin accounts (if multiple exist)
Part 2: Customer Portal Guide
Customer Registration
Creating a New Account
- Navigate to Registration Page
- Go to customer portal
- Click "Register" or "Sign Up"
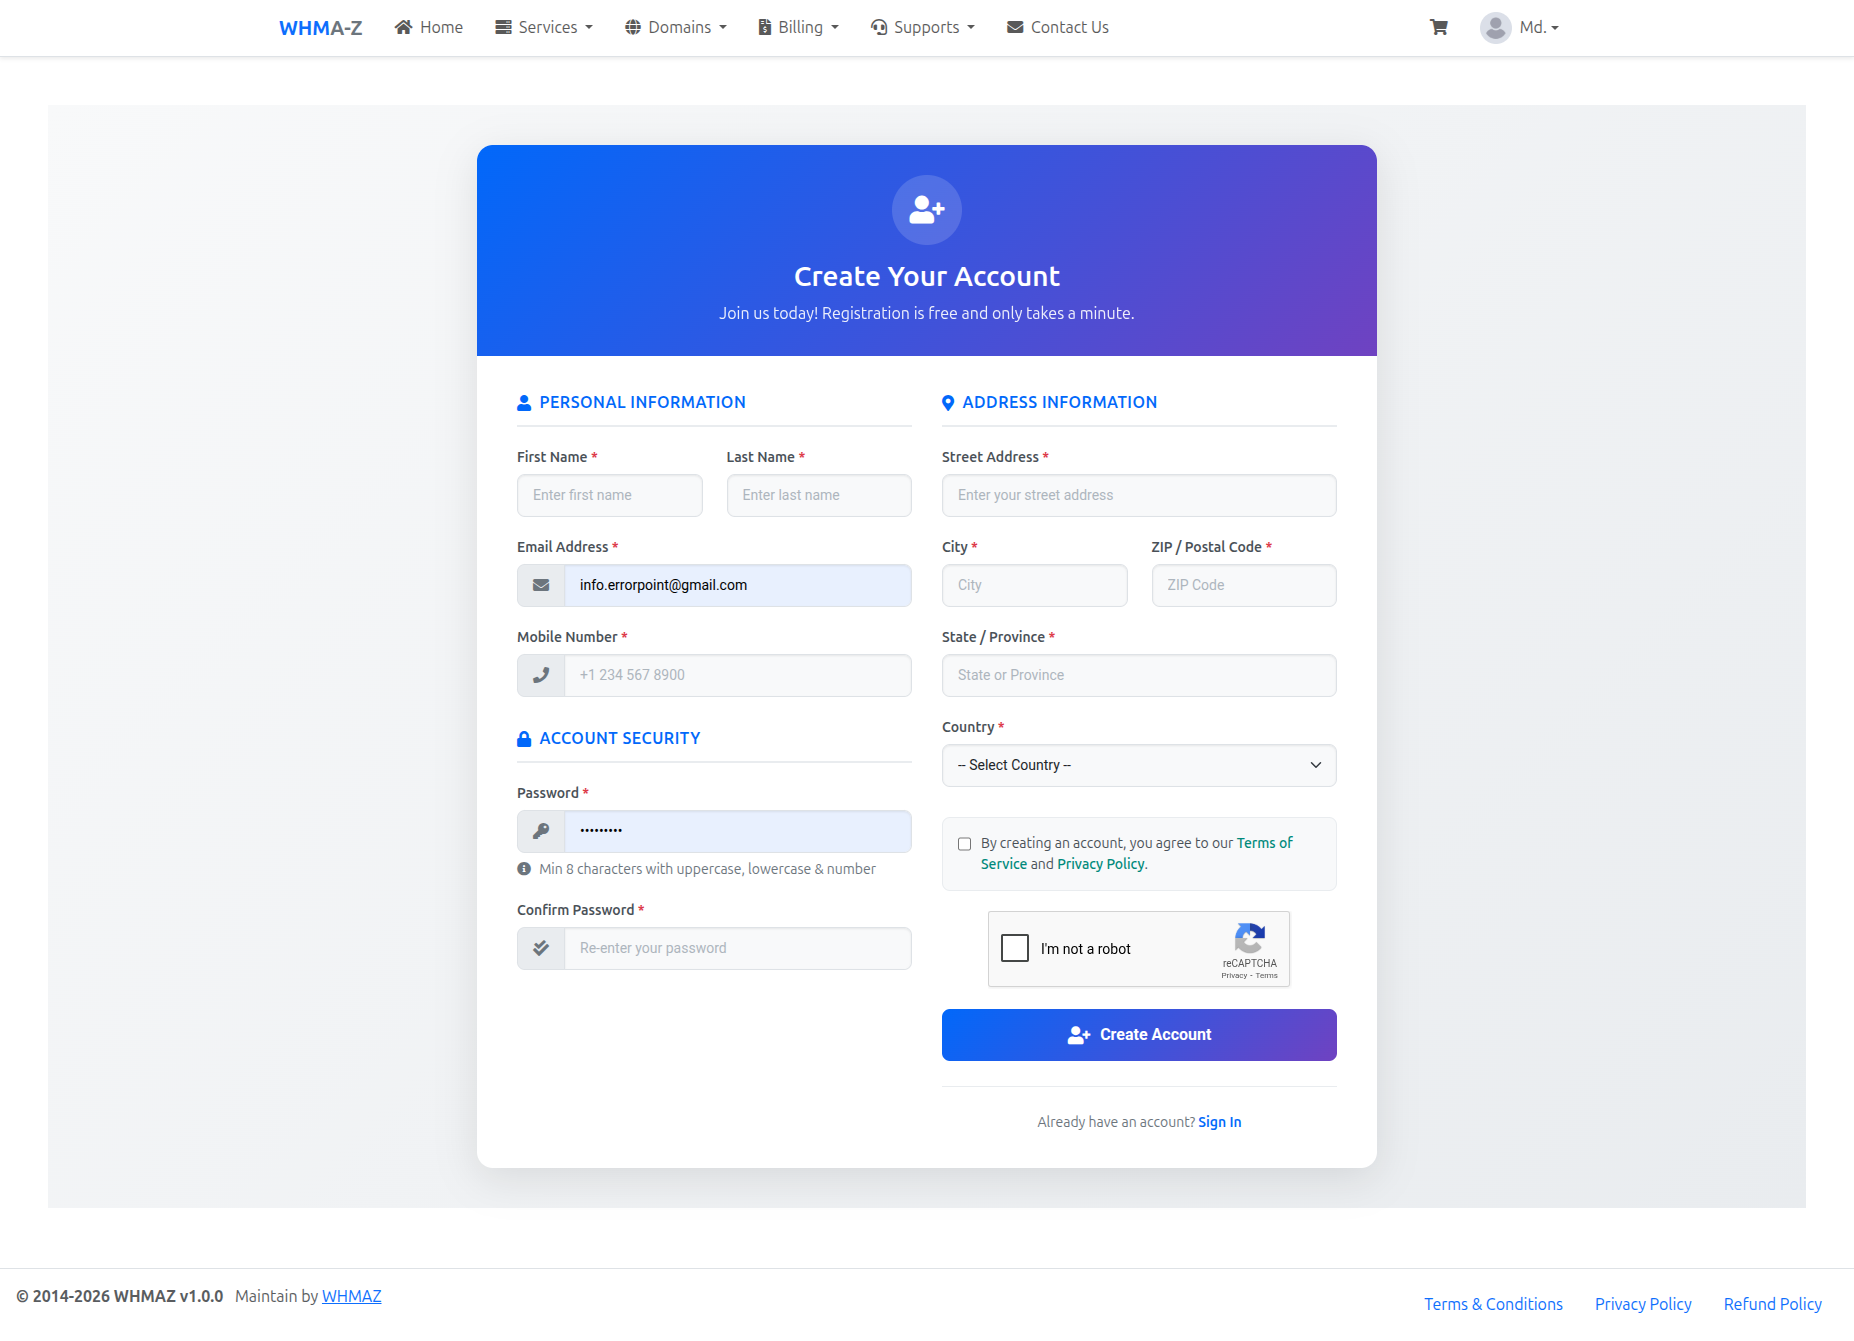
- Fill Registration Form
- Personal Information:
- First Name (required)
- Last Name (required)
- Email Address (required, used for login)
- Phone Number (optional)
- Account Security:
- Password (required, min 8 characters)
- Confirm Password (must match)
- Company Information: (optional)
- Company Name
- Tax ID/VAT Number
- Address Details:
- Street Address
- City
- State/Province
- ZIP/Postal Code
- Country (dropdown selection from countries database)
- Personal Information:
- Complete Security Verification
- Complete the Google reCAPTCHA checkbox ("I'm not a robot")
- This prevents automated bot registrations
- Accept Terms
- Read Terms of Service
- Check "I agree" checkbox
- Submit Registration
- Click "Register" button
- Check email for verification link
- Click verification link to activate account
Email Verification
After registration, a verification email is automatically sent to your registered email address:
- Check your email inbox (and spam/junk folder)
- Open the email from the system titled "Email Verification - [Company Name]"
- Click the "Verify My Email" link
- You will be redirected to the login page with a success message
- Your account is now activated -- you can login
Important: You cannot login until your email is verified. If you try to login before verifying, you will see a message asking you to check your email.
Verification URL format: https://yourdomain.com/auth/verify/{verification_hash}
Customer Dashboard
Dashboard Overview
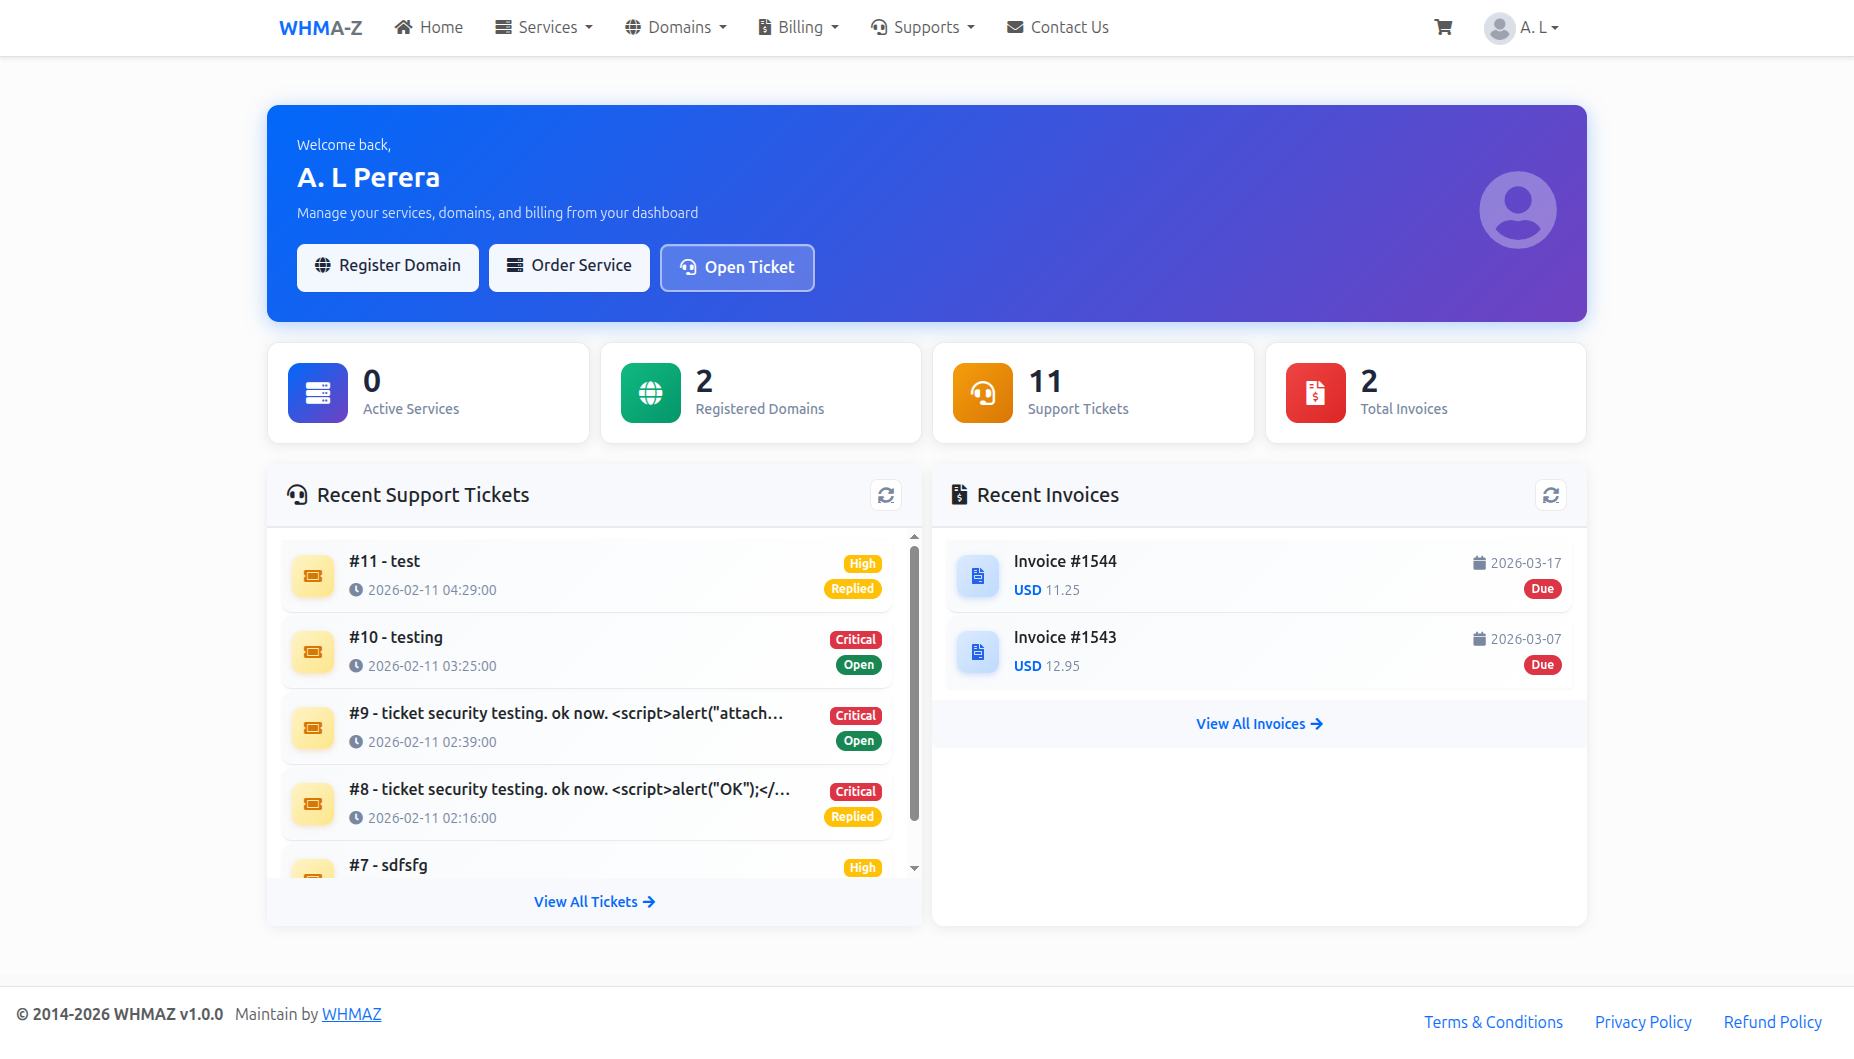
The customer dashboard provides a comprehensive overview of your account with a modern, professional design:
Welcome Banner:
- Personalized greeting with your name
- Quick description of available features
- Quick action buttons:
- Register Domain
- Order Service
- Open Ticket
Stat Cards (Top Row):
- Active Services: Number of active hosting/service orders with server icon
- Registered Domains: Total domain count with globe icon
- Support Tickets: Number of support tickets with headset icon
- Total Invoices: Invoice count with invoice icon
Each stat card features:
- Gradient icon backgrounds
- Real-time count display
- Click to navigate to detailed list
- Hover animation effects
Recent Activity Section:
- Recent Support Tickets: Latest tickets with priority and status badges
- Recent Invoices: Latest invoices with amounts and payment status
- View All links to full lists
- Refresh buttons for real-time updates
Navigation Menu
Main Menu Items:
- Dashboard: Overview and quick access
- Services: View and manage your orders/services
- Domains: Manage domain registrations
- Billing: View invoices and payment history
- Support: Tickets and knowledge base
- Contact Us: Contacting with service provider
Managing Profile
Updating Customer Password
- Change Password
- Navigate to
/clientarea/changePasswordor click "Change Password" in your account menu - Enter your current password
- Enter new password (minimum 8 characters)
- Confirm new password (must match)
- Click "Change Password"
- A confirmation email will be sent to your registered email address notifying you of the password change
- If you did not initiate the change, contact support immediately
- Navigate to
Setting Preferences
Notification Preferences:
- Email notifications for invoices
- Email notifications for tickets
- Email notifications for announcements
- Marketing emails (opt-in/opt-out)
Display Preferences:
- Preferred language (if multi-language supported)
- Timezone
- Date format
- Currency display
Ordering Services
Browsing Available Packages
- View Package List
- Go to "Domains" → "Register New Domain" or "Services" → "New Service"
- Browse available hosting packages
- Compare features and pricing
- Package Information
- Package name and description
- Features (CPU, RAM, Disk, Bandwidth)
- Pricing (monthly, quarterly, annually)
- Setup fee (if applicable)
Placing an Order
There are two ways to place an order depending on whether you start with a hosting package or a domain:
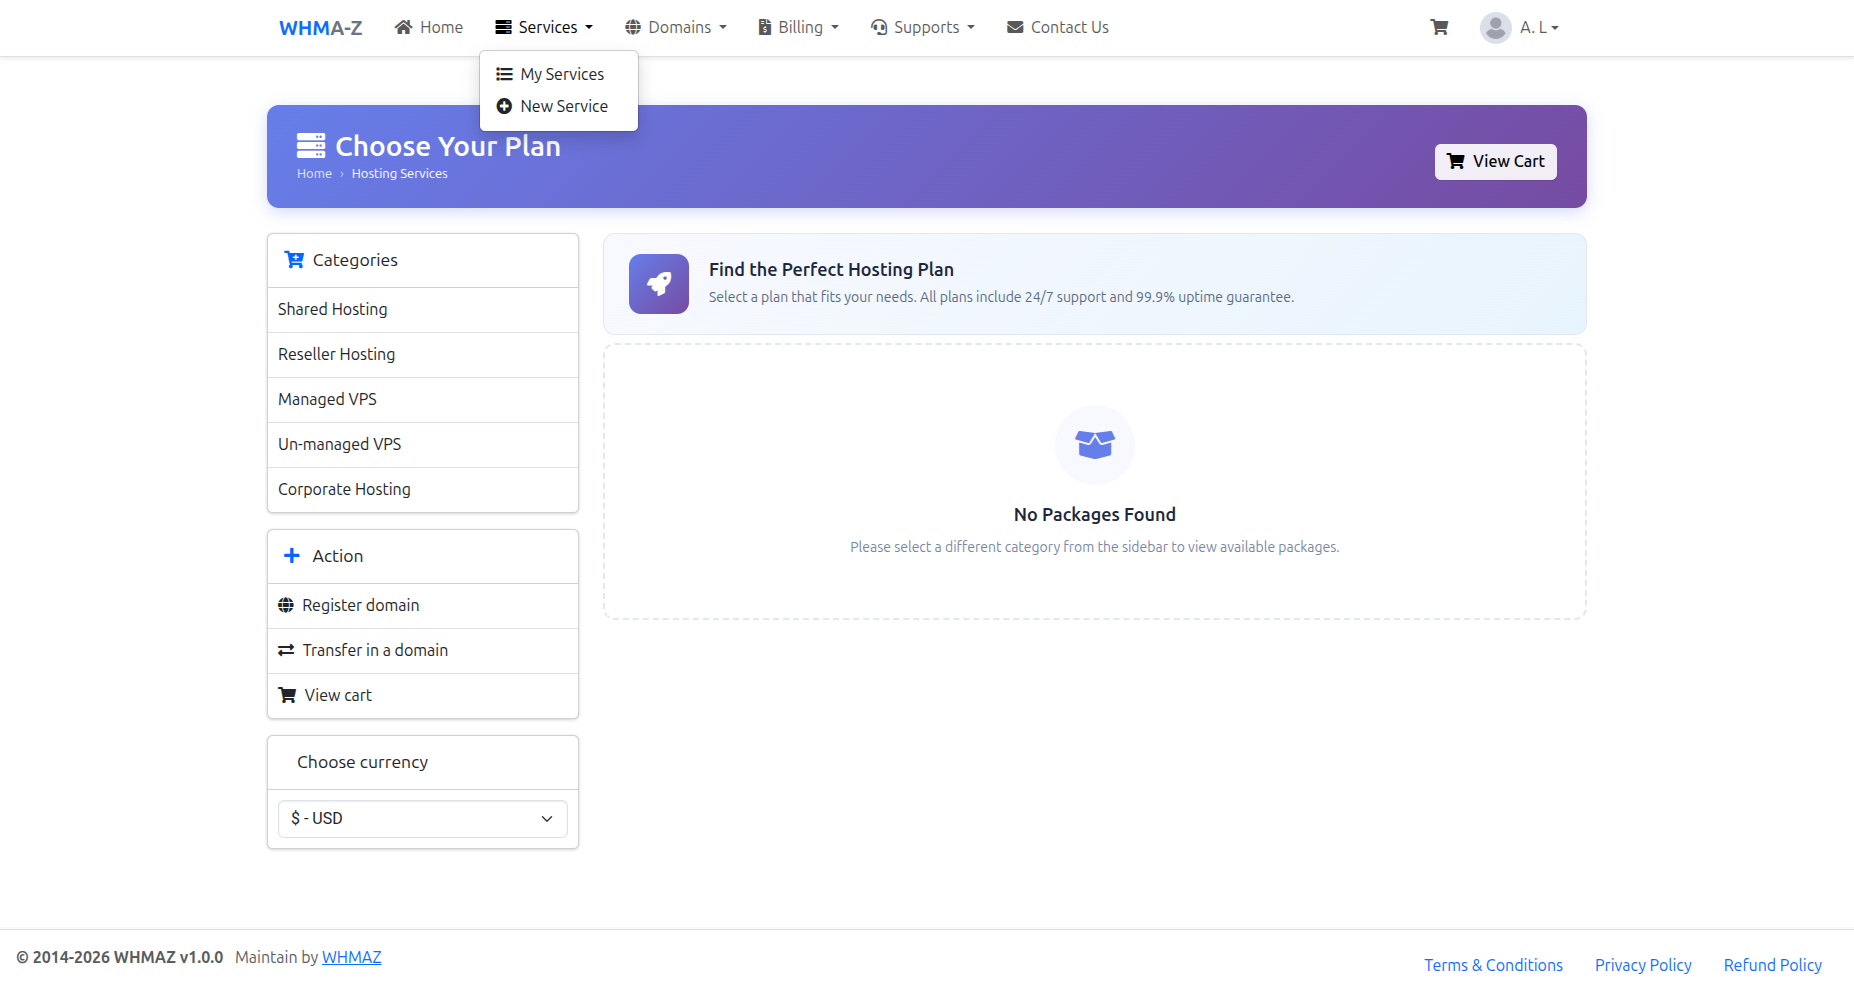
Flow 1: Hosting First (Recommended)
Step 1: Select Hosting Package
- Navigate to "Services" → "Hosting Services"
- Browse available hosting packages (Shared, Reseller, VPS)
- Choose billing cycle (monthly, quarterly, annually)
- Click "Choose Plan"
Step 2: Configure Domain
A modal will appear asking for your domain information. Choose one of three options:
| Option | Description |
|---|---|
| Update DNS | Use your existing domain - just point the DNS to our servers |
| Register New | Search for and register a new domain with your hosting |
| Transfer | Transfer your domain from another registrar (requires EPP/Auth code) |
- Update DNS: Enter your existing domain name (e.g., example.com)
- Register New: Search for available domains, select one from the results
- Transfer: Enter domain name and the EPP/Auth code from your current registrar
Step 3: Add to Cart
- Click "Add to Cart" to add both hosting and domain to your cart
- Both items are linked together for easy management
Step 4: Review Cart
- Navigate to "View Cart" to see your order
- Cart displays hosting package with linked domain underneath
- Verify pricing for both services
Step 5: Checkout
- Select payment method
- Add any special instructions (optional)
- Click "Proceed to Checkout"
Step 6: Payment
- Invoice is generated automatically
- Complete payment via selected gateway
- Service activation begins after payment confirmation
Flow 2: Domain First
Step 1: Search Domain
- Navigate to "Services" → "Register Domain"
- Enter desired domain name
- Complete reCAPTCHA verification (if enabled)
- Click "Search"
Step 2: Select Domain
- View search results showing availability and pricing
- Click "Add to Cart" on available domain
- View domain suggestions for alternatives
Step 3: Add Hosting (Optional)
- After adding domain, you can optionally add a hosting package
- Select hosting package and billing cycle
- Domain will be automatically linked to hosting
Step 4: Complete Order
- Review cart with domain (and hosting if selected)
- Proceed to checkout and payment

Shopping Cart Features
Cart Item Linking:
- When hosting and domain are purchased together, they are linked
- Linked items appear as parent-child in cart view
- Deleting parent item also removes linked child items
Cart Actions:
- Add More Services: Add additional packages to your order
- Remove Item: Delete individual items from cart
- Empty Cart: Clear all items from cart
Payment Options:
- Select from available payment gateways
- Add special instructions for your order
- Apply promotional codes (if available)
Order Status
Order Statuses:
- Pending: Order placed, awaiting payment
- Active: Service is active and running
- Suspended: Service suspended (usually due to non-payment)
- Cancelled: Service cancelled
- Fraud: Flagged for fraud review
Managing Existing Orders
- View All Orders
- Go to "Services" or "My Services"
- See list of all orders with status
- Order Details
- Click on order to view details
- See service specifications
- View billing information
- Check next due date
- Order Actions
- Upgrade/Downgrade: Request service change
- Renew: Pay renewal invoice
- Cancel: Request cancellation
- Support: Open ticket for this service
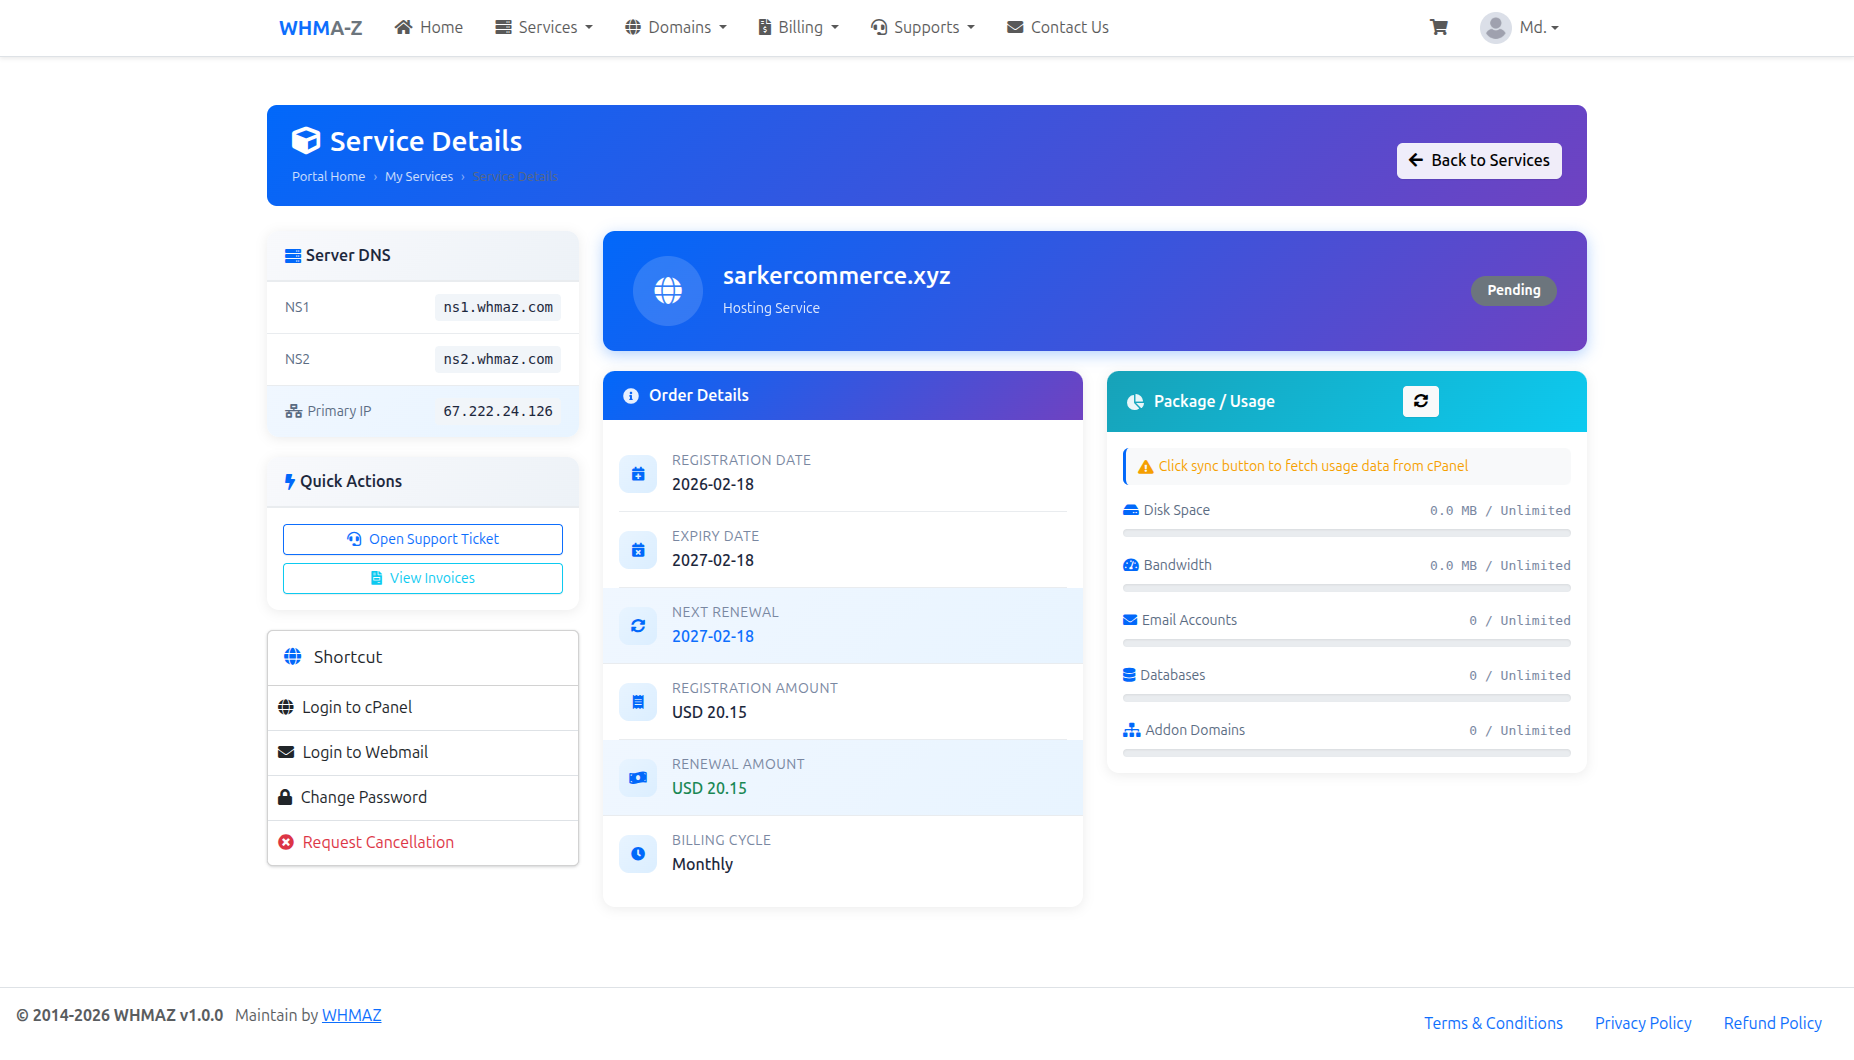
Hosting Usage Sync (Real-Time)
For hosting services with a control panel (cPanel, Plesk, or DirectAdmin), you can sync real-time usage statistics from your hosting account.
Viewing Service Details:
- Go to "Services" → "My Services"
- Click on a hosting service to view details
- The Package / Usage card shows your resource usage
Syncing Usage:
- In the Service Detail page, find the "Package / Usage" card
- Click the sync button (rotating arrow icon) in the card header
- Wait for the sync to complete (button will spin while syncing)
- Usage data will update automatically:
- Disk Space - Used vs allocated storage
- Bandwidth - Monthly data transfer usage
- Email Accounts - Number of email accounts created
- Databases - Number of MySQL databases
- Addon Domains - Additional domains hosted
Usage Information:
- Progress bars show percentage of resources used
- Green/blue bars indicate normal usage
- Warning colors appear when approaching limits
- "Last synced" timestamp shows when data was last updated
Note: The sync button requires:
- An active hosting account linked to the service
- Server connection and module configured by administrator
- Username set in the service configuration
Domain Management
Searching for Domains
- Access Domain Search
- Go to "Domains" → "Register Domain"
- Or use search box on homepage
- Enter Domain Name
- Type desired domain name (e.g., "mybusiness" or "mybusiness.com")
- Complete reCAPTCHA verification (if enabled by administrator)
- Click "Search"
- View Results
- Available domains shown with pricing
- Unavailable domains indicated
- Alternative domain suggestions displayed below
- Pricing shown for each available extension
- Domain Suggestions
- System automatically shows alternative domain names
- Suggestions based on your search keyword
- Different extensions offered (.com, .net, .org, etc.)

Registering a Domain
Step 1: Select Domain
- Check boxes next to desired domains
- Review pricing for selected registration period
- Add to cart
Step 2: Configure Domain
- Set nameservers (use default or custom)
- Enable WHOIS privacy (if available)
- Select registration period (1-10 years)
Step 3: Complete Registration
- Review domain order
- Proceed to checkout
- Invoice generated
- Complete payment
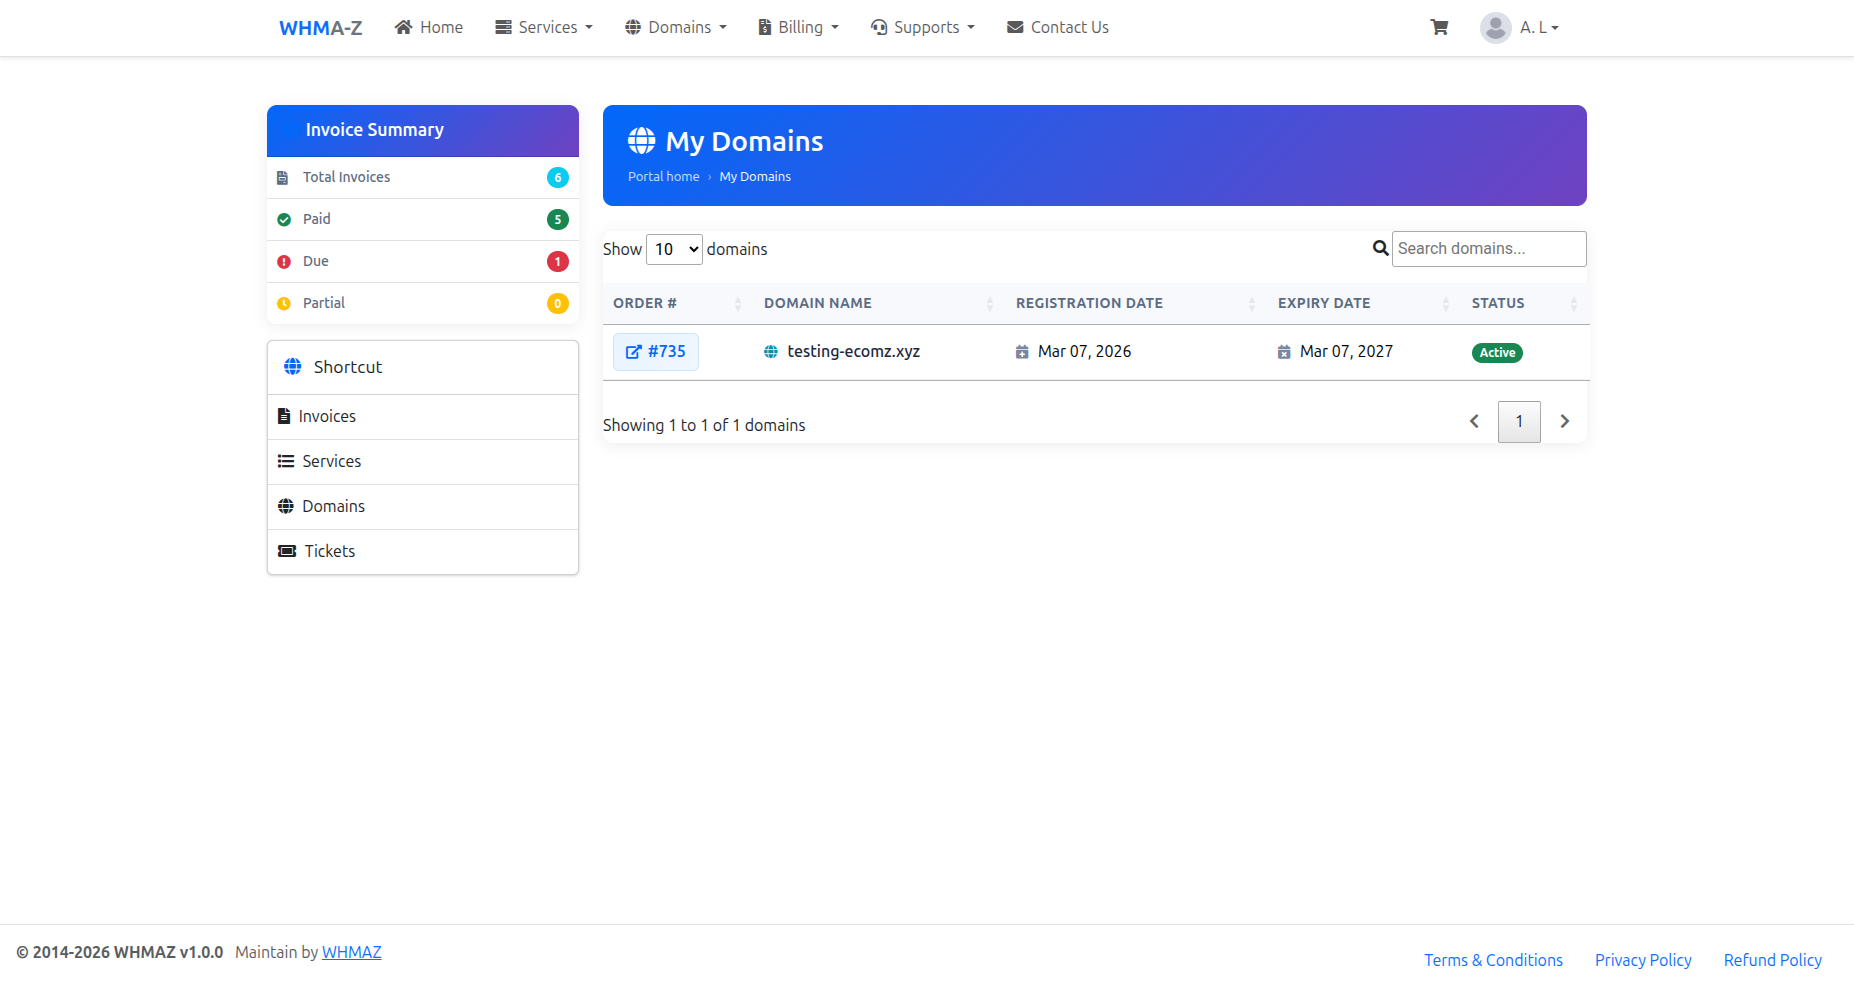
Managing Domains
Domain List:
- View all registered domains
- See expiration dates
- Check renewal status
- Filter by status (Active, Expired, etc.)
Domain Actions:
- Renew: Pay renewal invoice
- Transfer: Initiate domain transfer
- Nameservers: Update DNS settings
- WHOIS: Update contact information
- Auto-Renew: Enable/disable automatic renewal
Domain Transfer
Transferring Domain to Your Account:
There are two ways to transfer a domain:
Option 1: Transfer with Hosting Purchase
- Select a hosting package
- In the domain modal, choose "Transfer"
- Enter your domain name
- Enter the EPP/Auth code from your current registrar
- Domain transfer and hosting are added to cart together
- Complete checkout and payment
Option 2: Transfer Domain Only
- Go to "Domains" → "Transfer Domain"
- Enter domain name
- Enter authorization/EPP code
- Add to cart
- Optionally add hosting package
- Complete checkout and payment
After Checkout:
- Transfer request is submitted to registry
- You'll receive a confirmation email from current registrar
- Approve the transfer via email link
- Transfer completes within 5-7 days
- 1 year is added to your domain registration
Transfer Requirements:
- Domain must be unlocked at current registrar
- Domain must not be within 60 days of registration or last transfer
- Valid authorization/EPP code required (get from current registrar)
- Admin contact email must be accessible for approval
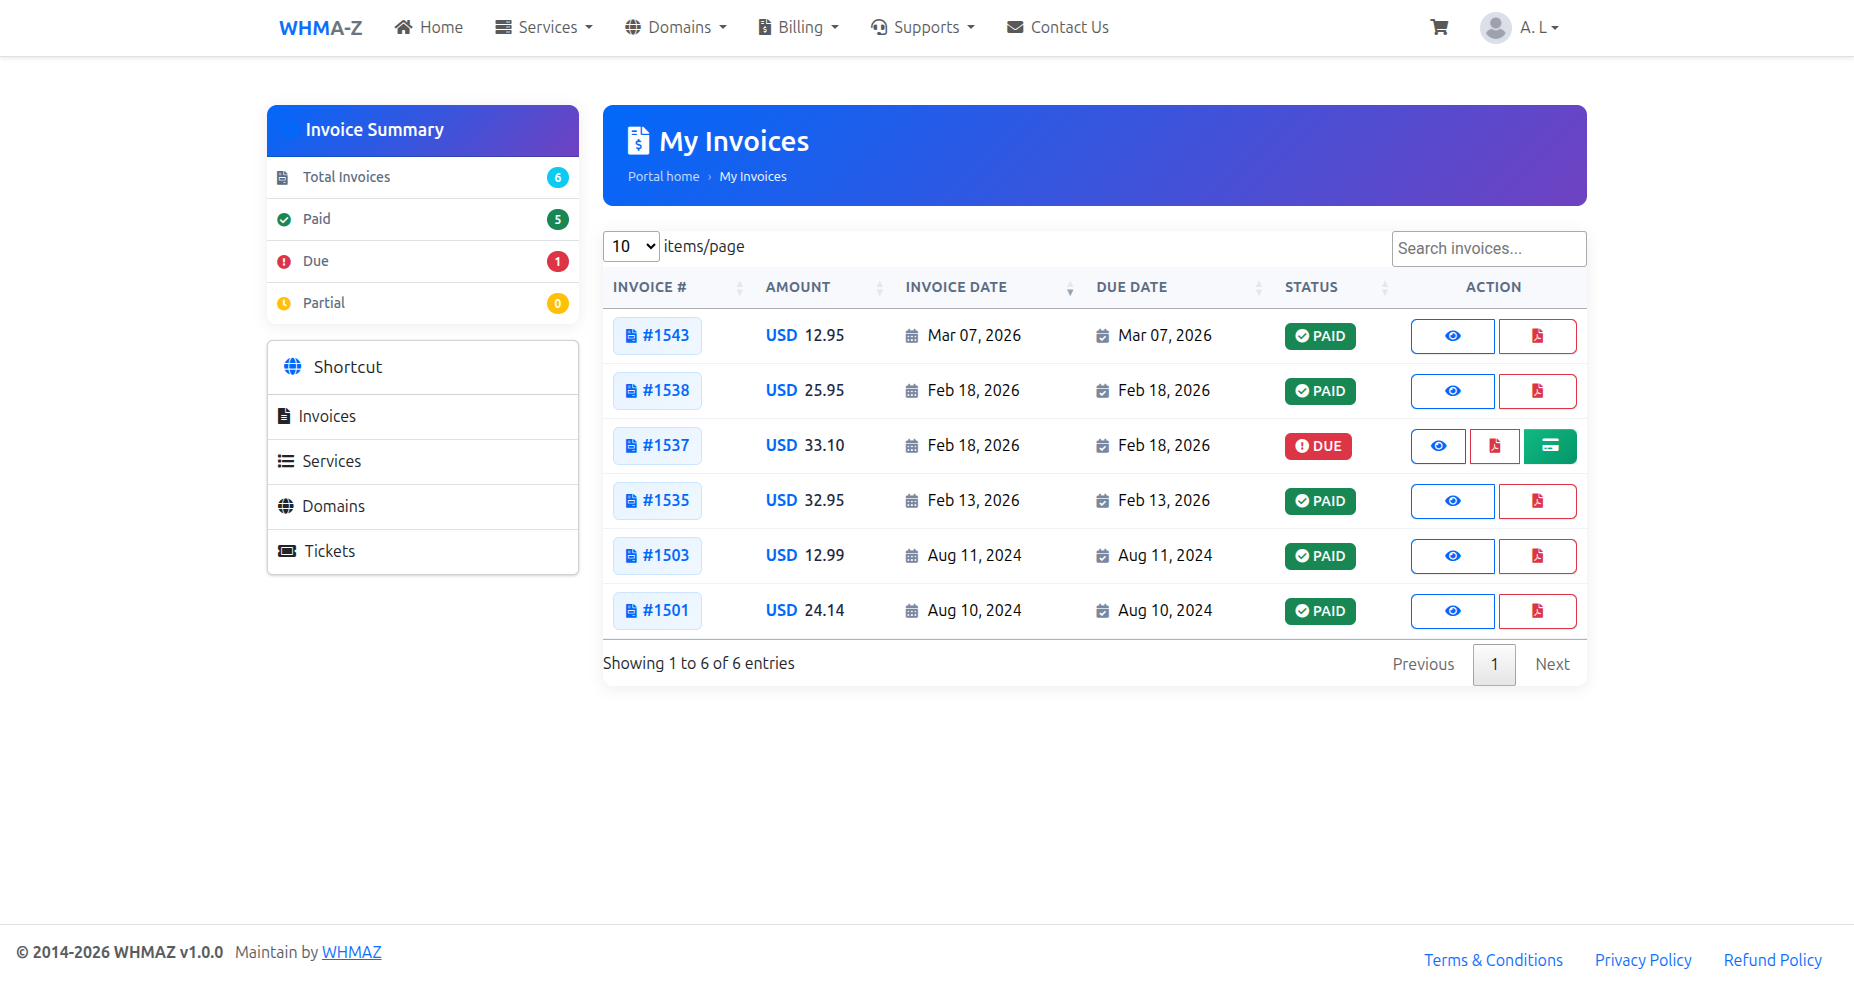
Viewing Invoices
Invoice List
- Access Invoices
- Go to "Billing" → "Invoices"
- View all invoices (paid and unpaid)
- Invoice Information
- Invoice number
- Invoice date
- Due date
- Total amount
- Status (Paid, Unpaid, Cancelled)
Invoice Details
Click on invoice to view:
- Invoice Header:
- Company information
- Your billing address
- Invoice number and date
- Due date and status
- Line Items:
- Item description (service, domain, etc.)
- Quantity
- Unit price
- Subtotal
- Totals:
- Subtotal
- Tax (if applicable)
- Total amount due
- Payment Information:
- Payment status
- Payment date (if paid)
- Payment method used
- Transaction ID
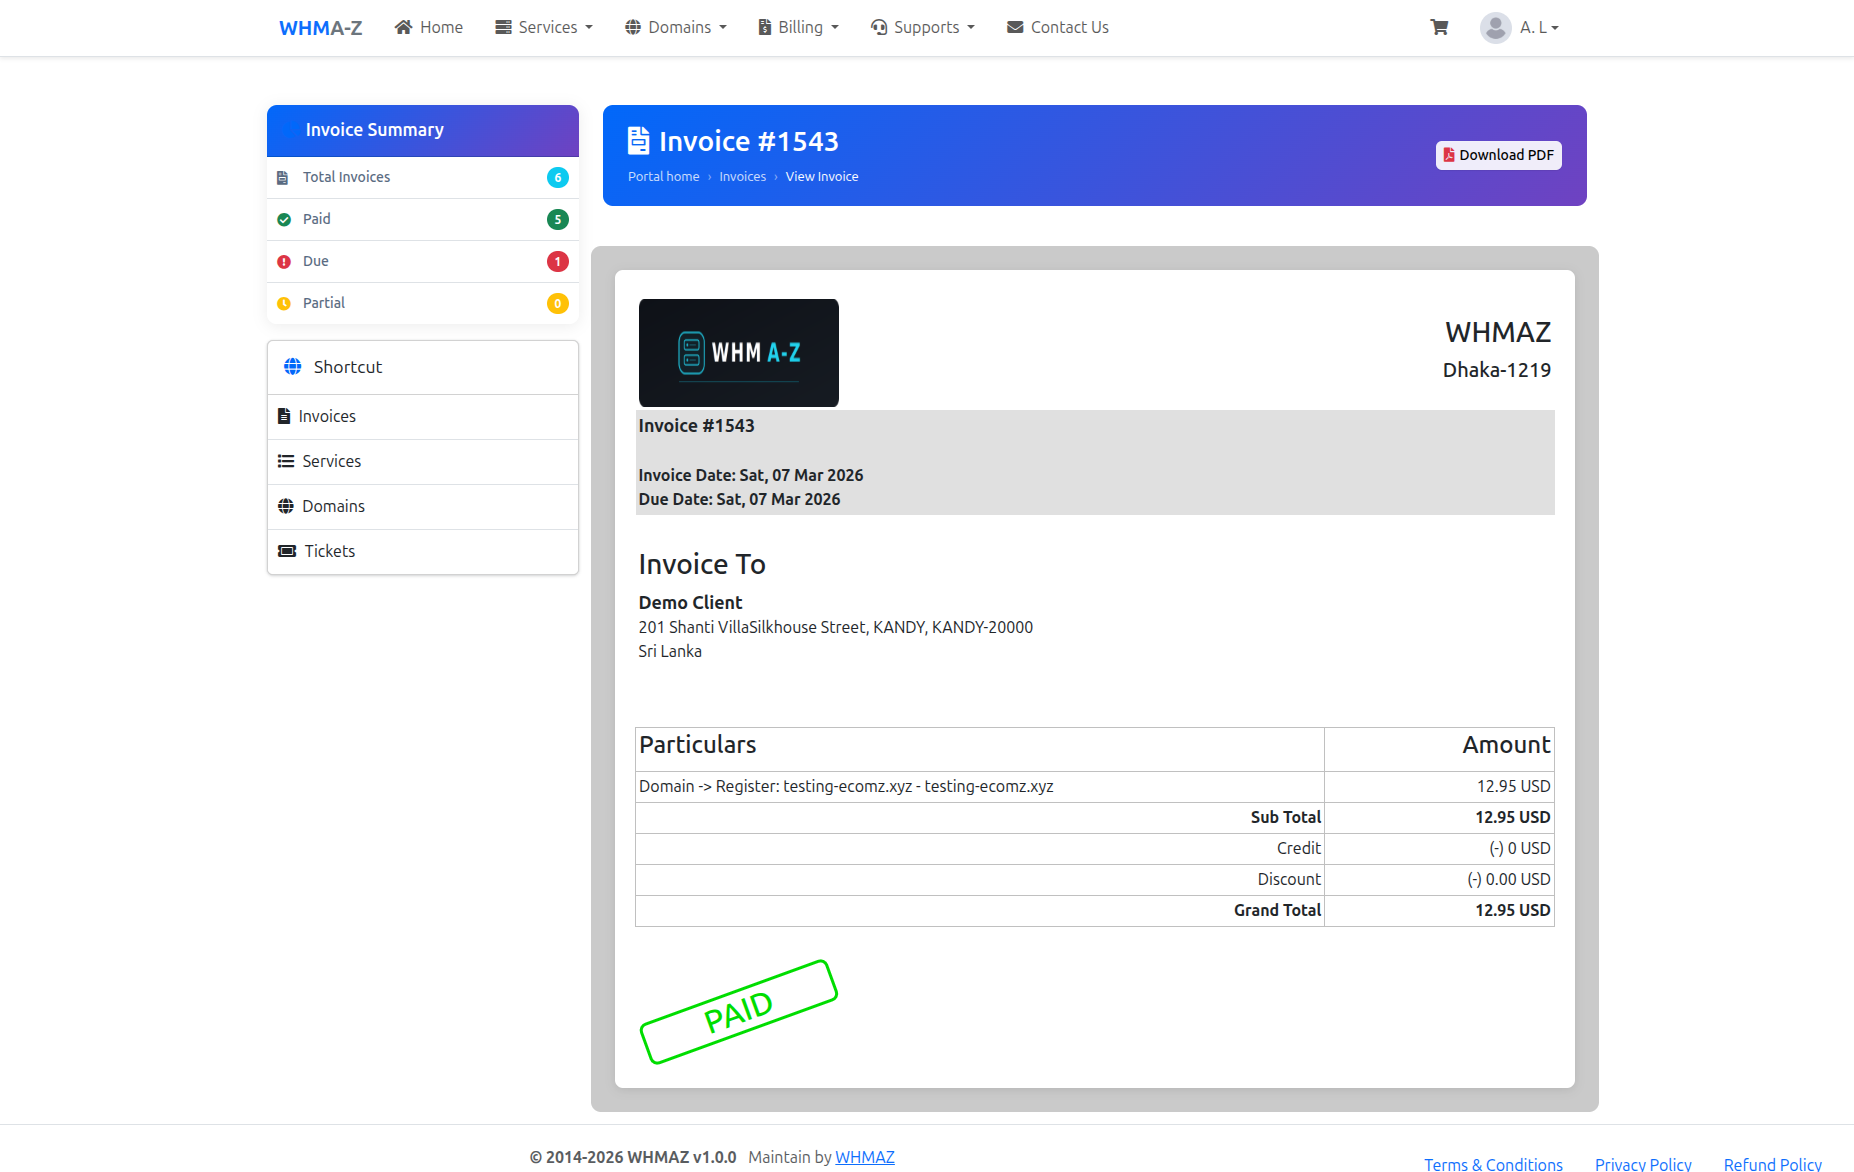
Downloading Invoices
- Click "Download PDF" button
- PDF invoice generated
- Suitable for printing or record-keeping
- Contains all invoice details
Recurring Invoices
Automatic Invoice Generation:
- System generates invoices before service expiration
- Invoices sent via email
- Grace period before suspension (typically 3-7 days)
- Reminders sent for unpaid invoices
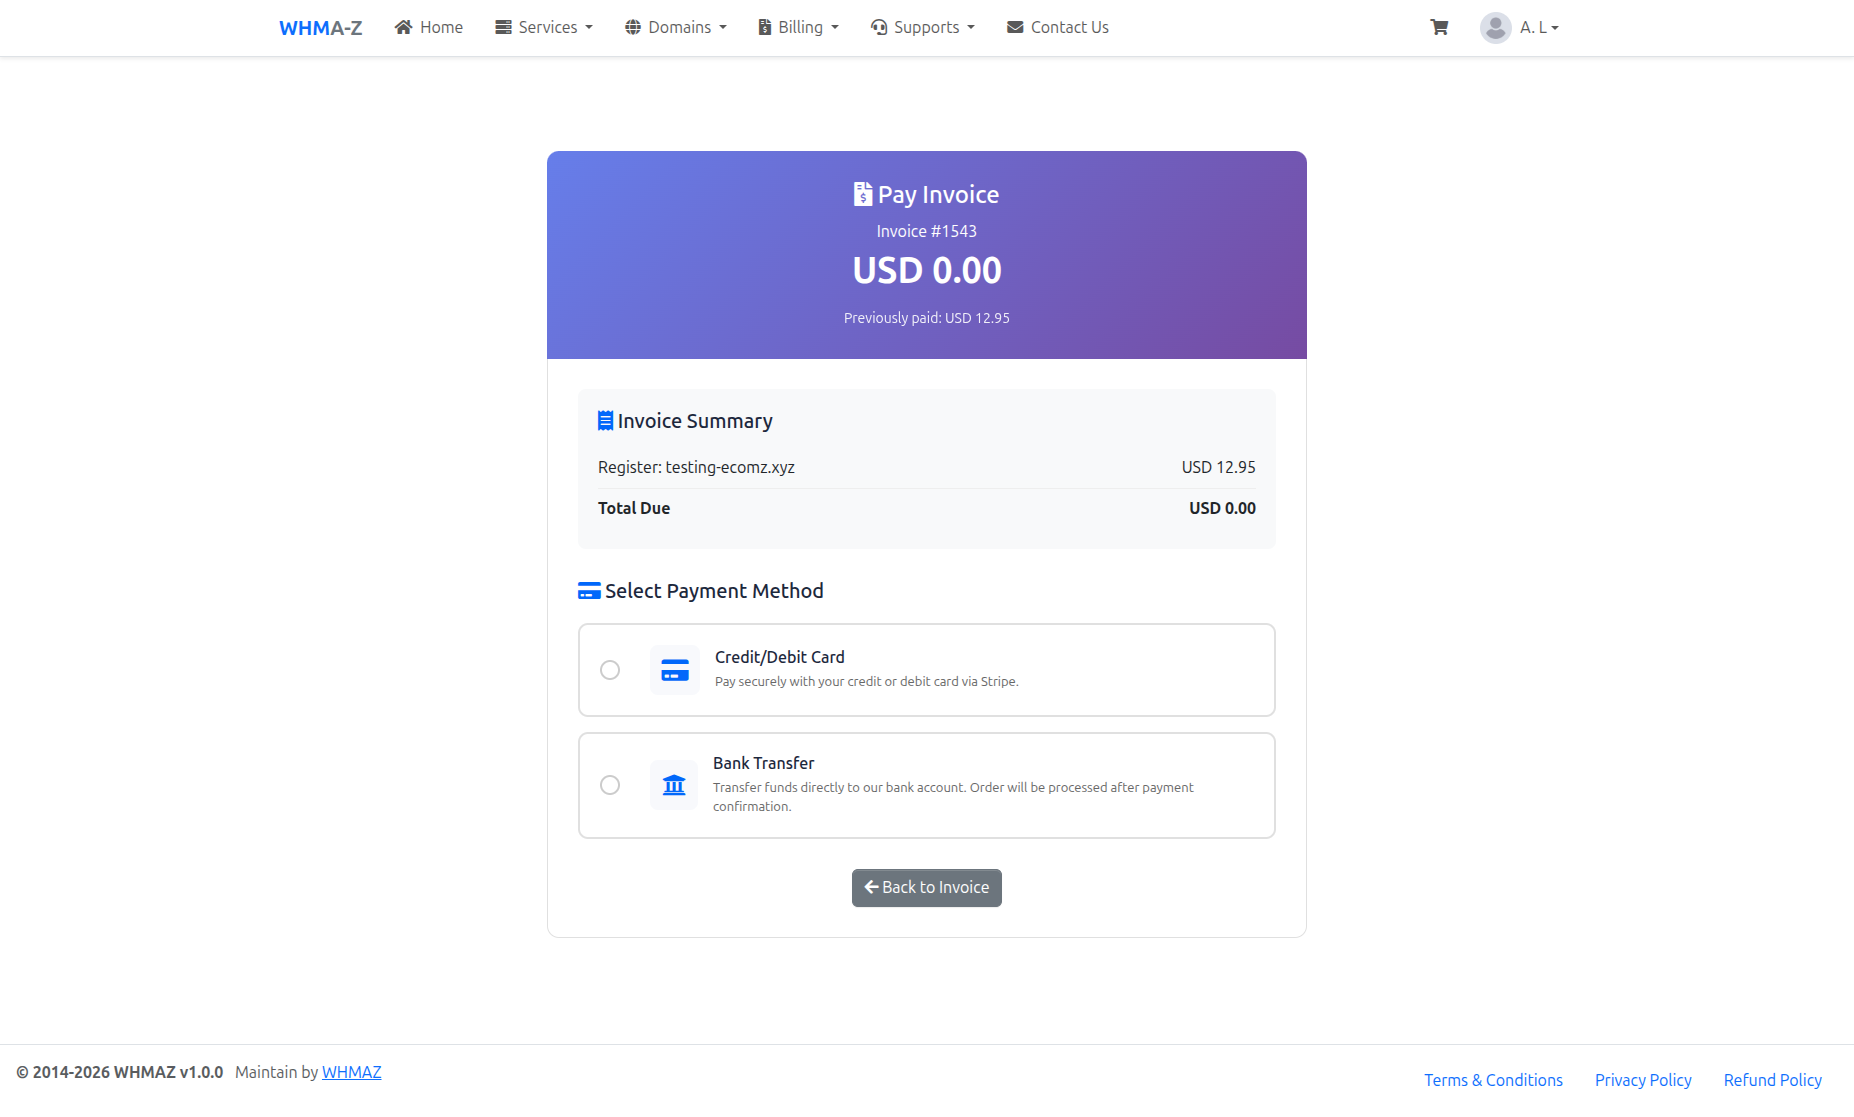
Making Payments
Payment Methods
Available payment methods (configured by administrator):
- Credit/Debit Card (via Stripe)
- SSLCommerz (Bangladesh payments)
- Bank Transfer/Wire Transfer
- Credit Balance (if you have account credit)
Paying an Invoice
- Open Unpaid Invoice
- Go to "Billing" → "Invoices"
- Click on unpaid invoice
- Select Payment Method
- Choose preferred payment method
- Click "Pay Now"
- Complete Payment
- For Stripe: Enter card details
- For SSLCommerz: Complete payment on SSLCommerz page
- For bank transfer: View payment instructions
- Confirm payment
- Payment Confirmation
- Payment processed
- Invoice marked as paid
- Receipt sent via email
- Service activated/renewed
Payment History
View All Transactions:
- Go to "Billing" → "Transactions"
- See all completed payments
- Filter by date, amount, or payment method
Transaction Details:
- Transaction ID
- Date and time
- Amount paid
- Payment method
- Associated invoice
- Receipt download
Account Credit
Adding Credit:
- Option to add funds to account
- Use credit for future payments
- Automatic deduction from credit balance
Credit Balance:
- View current credit balance in dashboard
- Credit automatically applied to new invoices
- Refund to original payment method (if requested)
Support Tickets
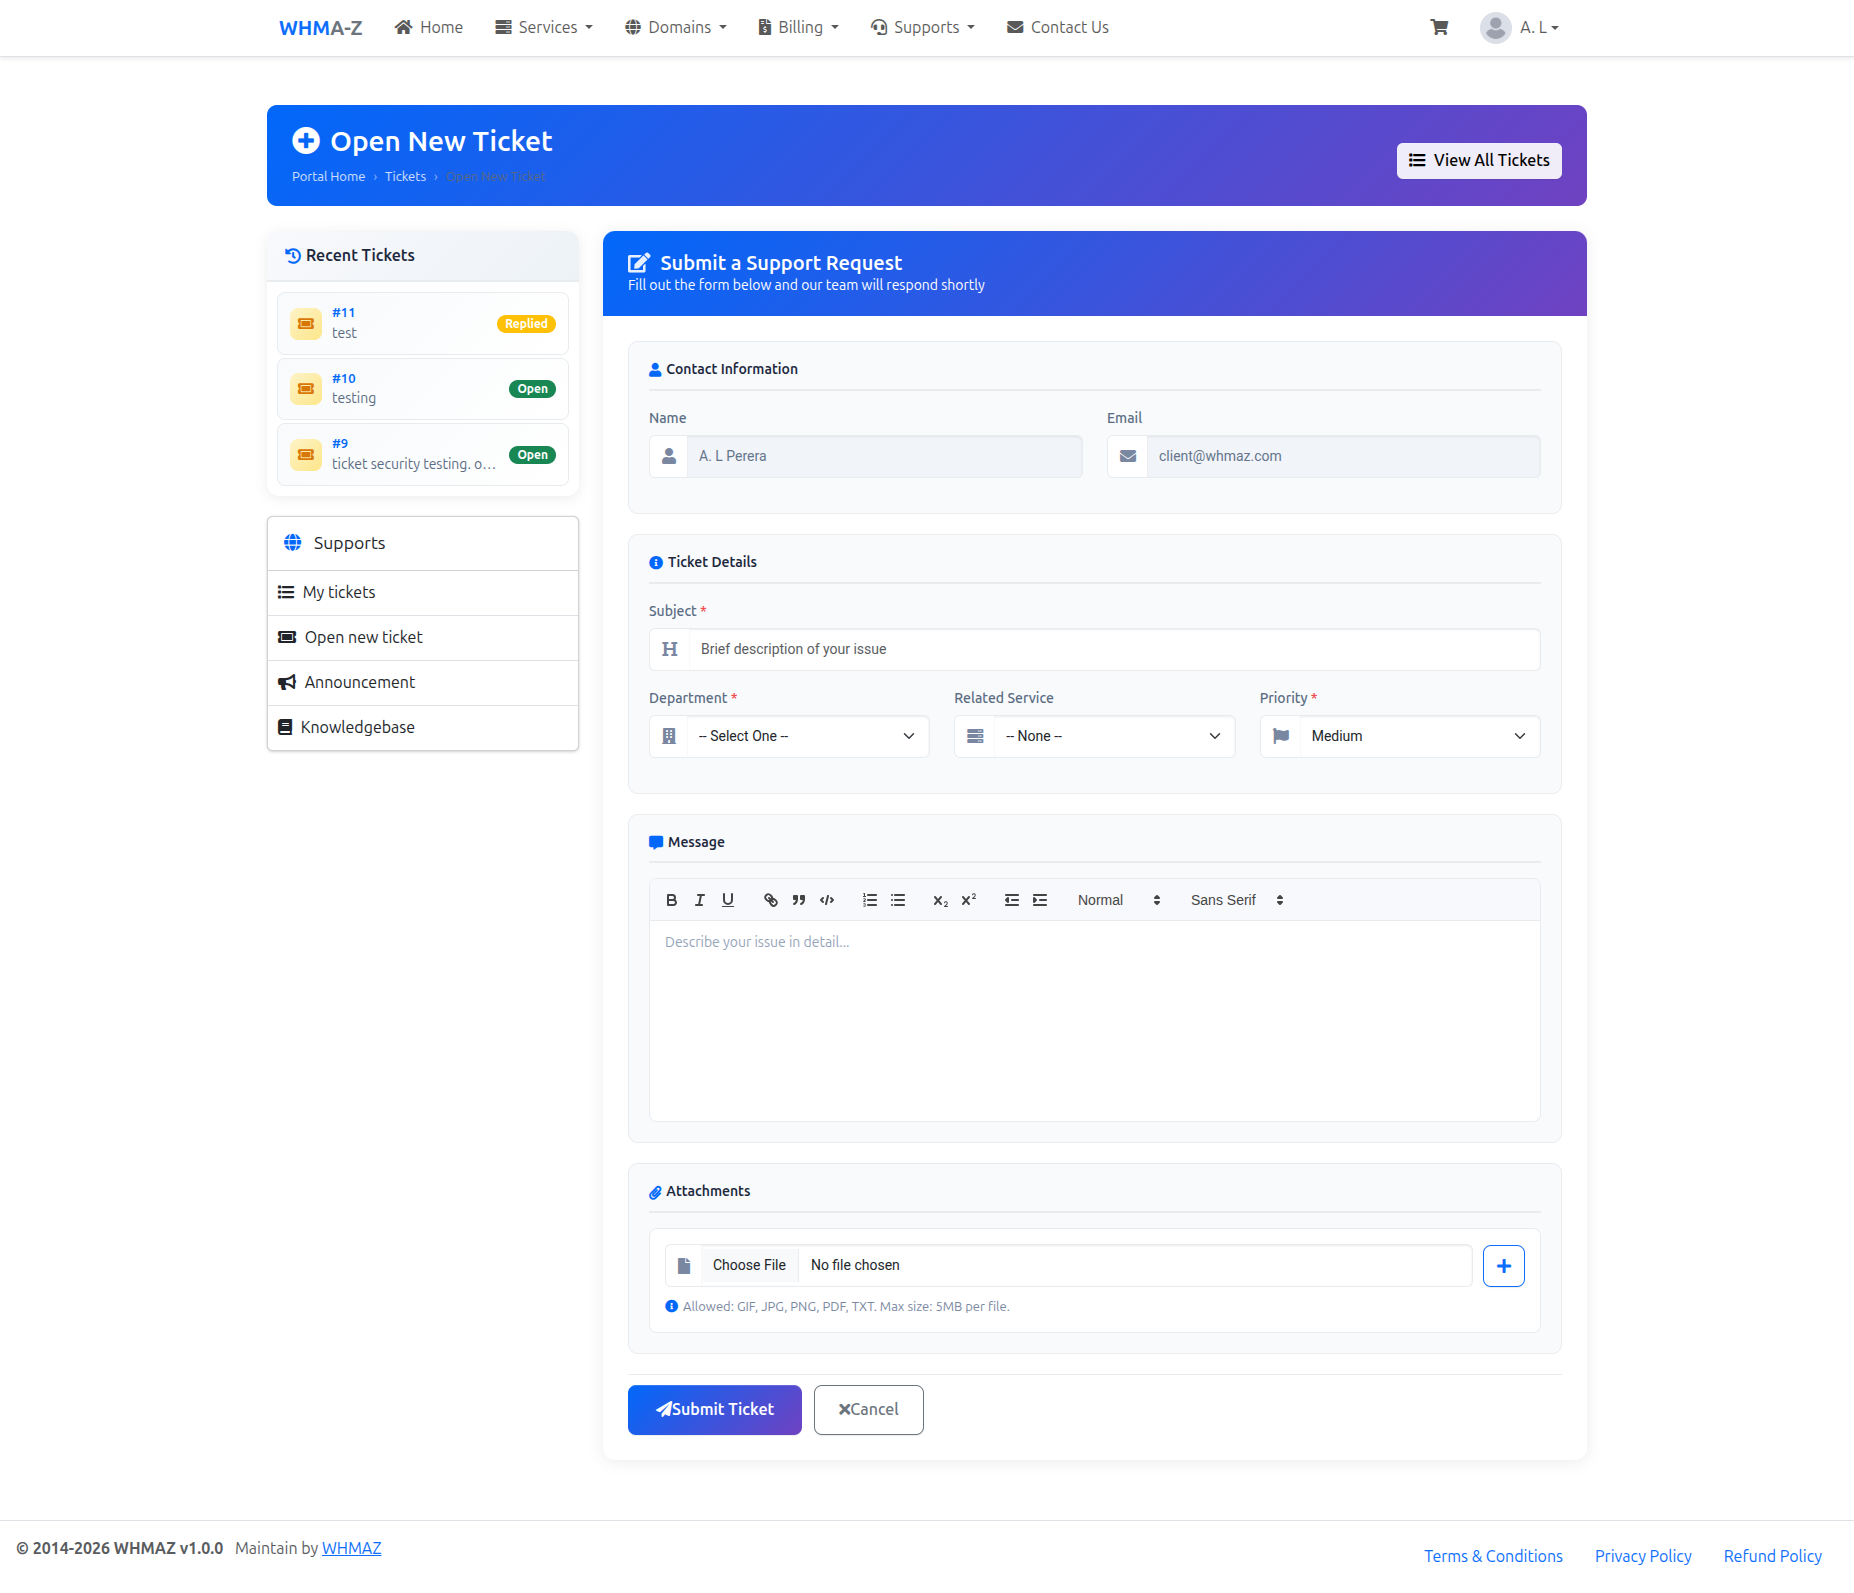
Creating a Support Ticket
- Open Ticket Form
- Go to "Support" → "Open Ticket"
- Or click "Get Support" from service details
- Modern, beautified form with organized sections
- Contact Information Section
- Name (pre-filled, read-only)
- Email (pre-filled, read-only)
- Ticket Details Section
- Subject: Brief description of issue (required)
- Department: Select appropriate department (required)
- Technical Support
- Billing Support
- Sales
- General Inquiry
- Related Service: Select from your active services (optional)
- Dropdown shows your active hosting accounts with domain names
- Format: "Product Name (domain.com)"
- Helps support staff identify the affected service quickly
- Priority: Select urgency level (required)
- Low (general questions)
- Medium (minor issues)
- High (service affecting)
- Critical (urgent, service down)
- Message Section
- Rich text editor (Quill) with formatting toolbar
- Support for bold, italic, underline, lists, links, code blocks
- Detailed description of your issue
- Attachments Section
- Upload screenshots or files
- Allowed types: GIF, JPG, PNG, PDF, TXT
- Maximum 5MB per file
- Multiple attachments supported (click + button to add more)
- Submit Ticket
- Click "Submit Ticket" button
- Ticket number assigned
- Confirmation email sent
- Support team notified
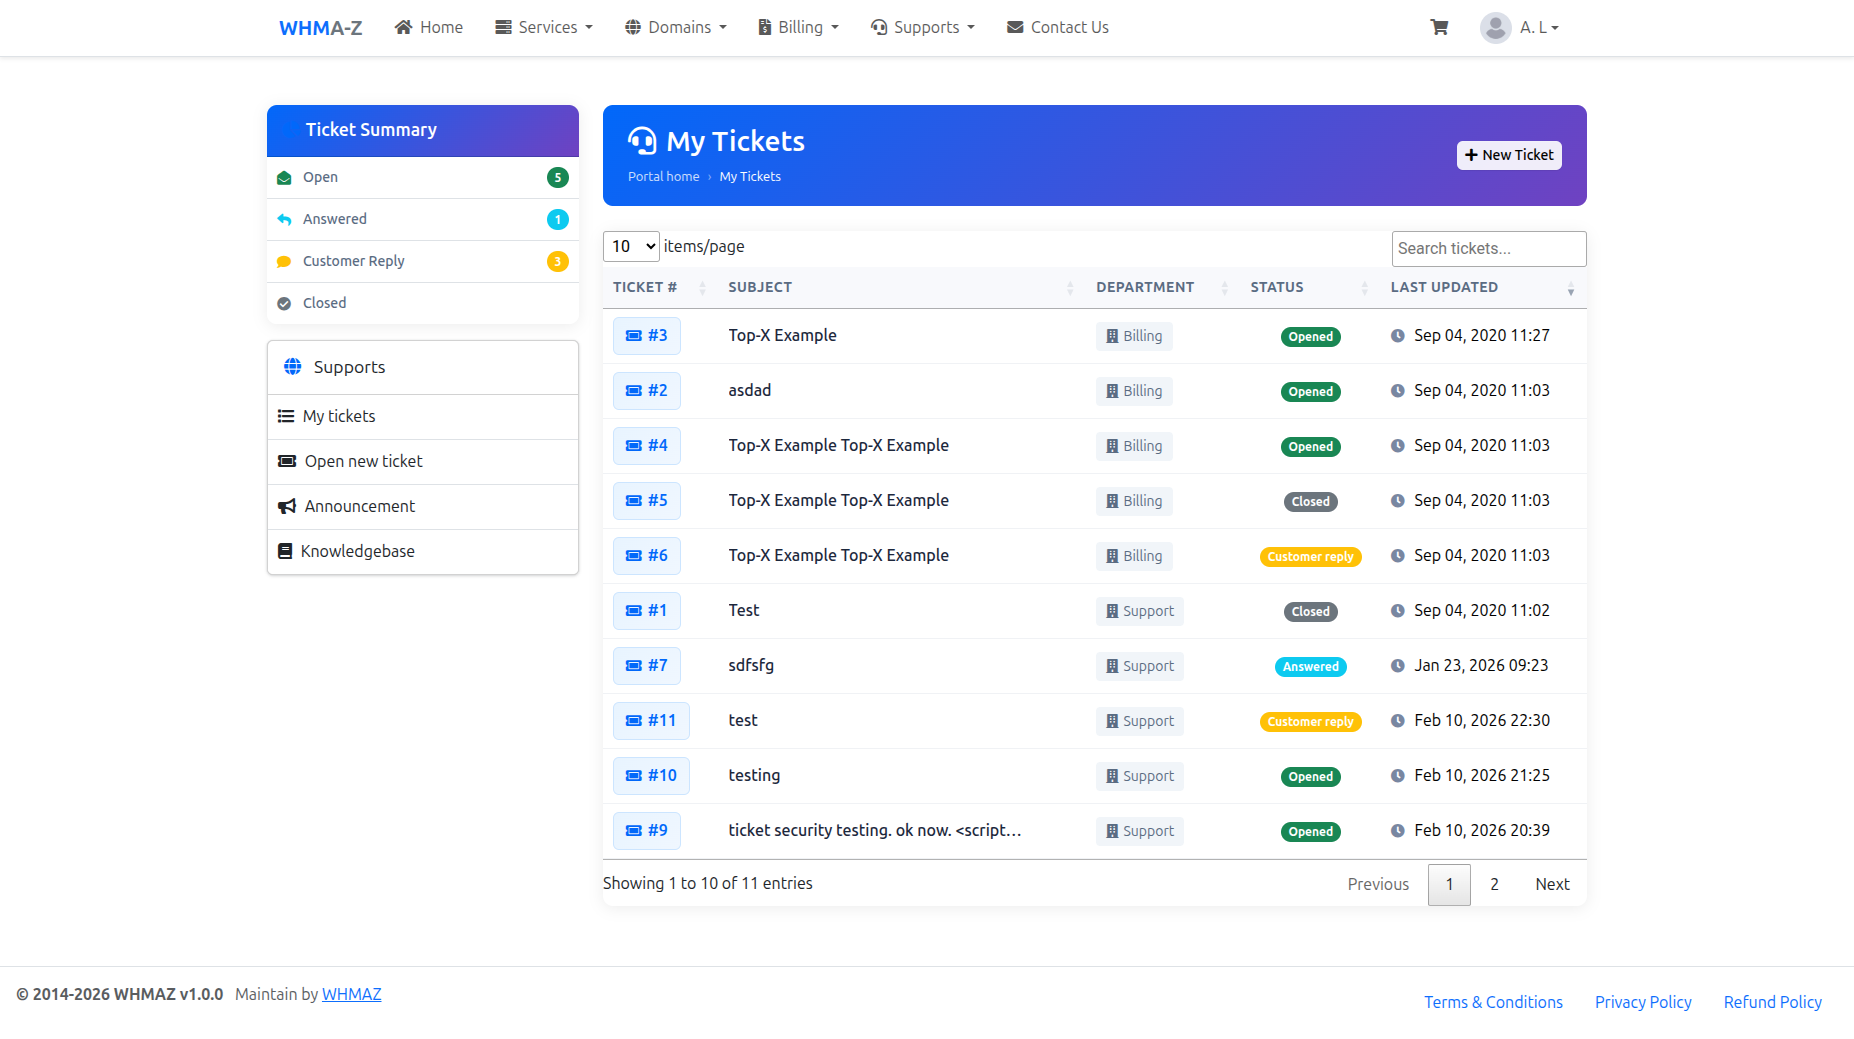
Managing Tickets
Ticket List:
- View all your tickets
- See ticket status:
- Open: New ticket, awaiting response
- Pending: Your response needed
- Answered: Support team replied
- Resolved: Issue resolved
- Closed: Ticket closed
Ticket Actions:
- Click ticket to view conversation
- Reply to ticket
- Upload additional files
- Close ticket (if resolved)
- Reopen ticket (if issue persists)
Replying to Tickets
- Open Ticket
- Click on ticket from list
- View full conversation history in a modern thread layout
- Ticket Information Sidebar
- Status badge showing current ticket state
- Department assignment
- Priority level with color-coded badge
- Submitted date
- Last updated date
- Conversation Thread
- Messages displayed as styled bubbles
- Color-coded by sender:
- Blue border: Your messages (customer)
- Green border: Staff/Admin replies
- Purple border: Original ticket message
- Each message shows:
- Sender name with avatar
- Timestamp
- Message content with rich text support
- Helpful/Not Helpful feedback buttons
- Attachment links (if any)
- Add Reply
- Use the rich text editor (Quill) at the top
- Format text with bold, italic, lists, links, etc.
- Attach files (GIF, JPG, PNG, PDF, TXT - max 5MB)
- Click "Send Reply" button
- Email Notifications
- You receive email when support replies
- Click link in email to view ticket
- Reply via portal (not by email reply)
Best Practices for Support
For Faster Resolution:
- Provide detailed description
- Include error messages (screenshots helpful)
- Specify when issue started
- Mention what you were doing when issue occurred
- Include relevant URLs or account details
- Set appropriate priority level
- Respond promptly to support questions
Avoid:
- Opening multiple tickets for same issue
- Marking all tickets as urgent
- Providing incomplete information
- Expecting instant responses (check SLA)
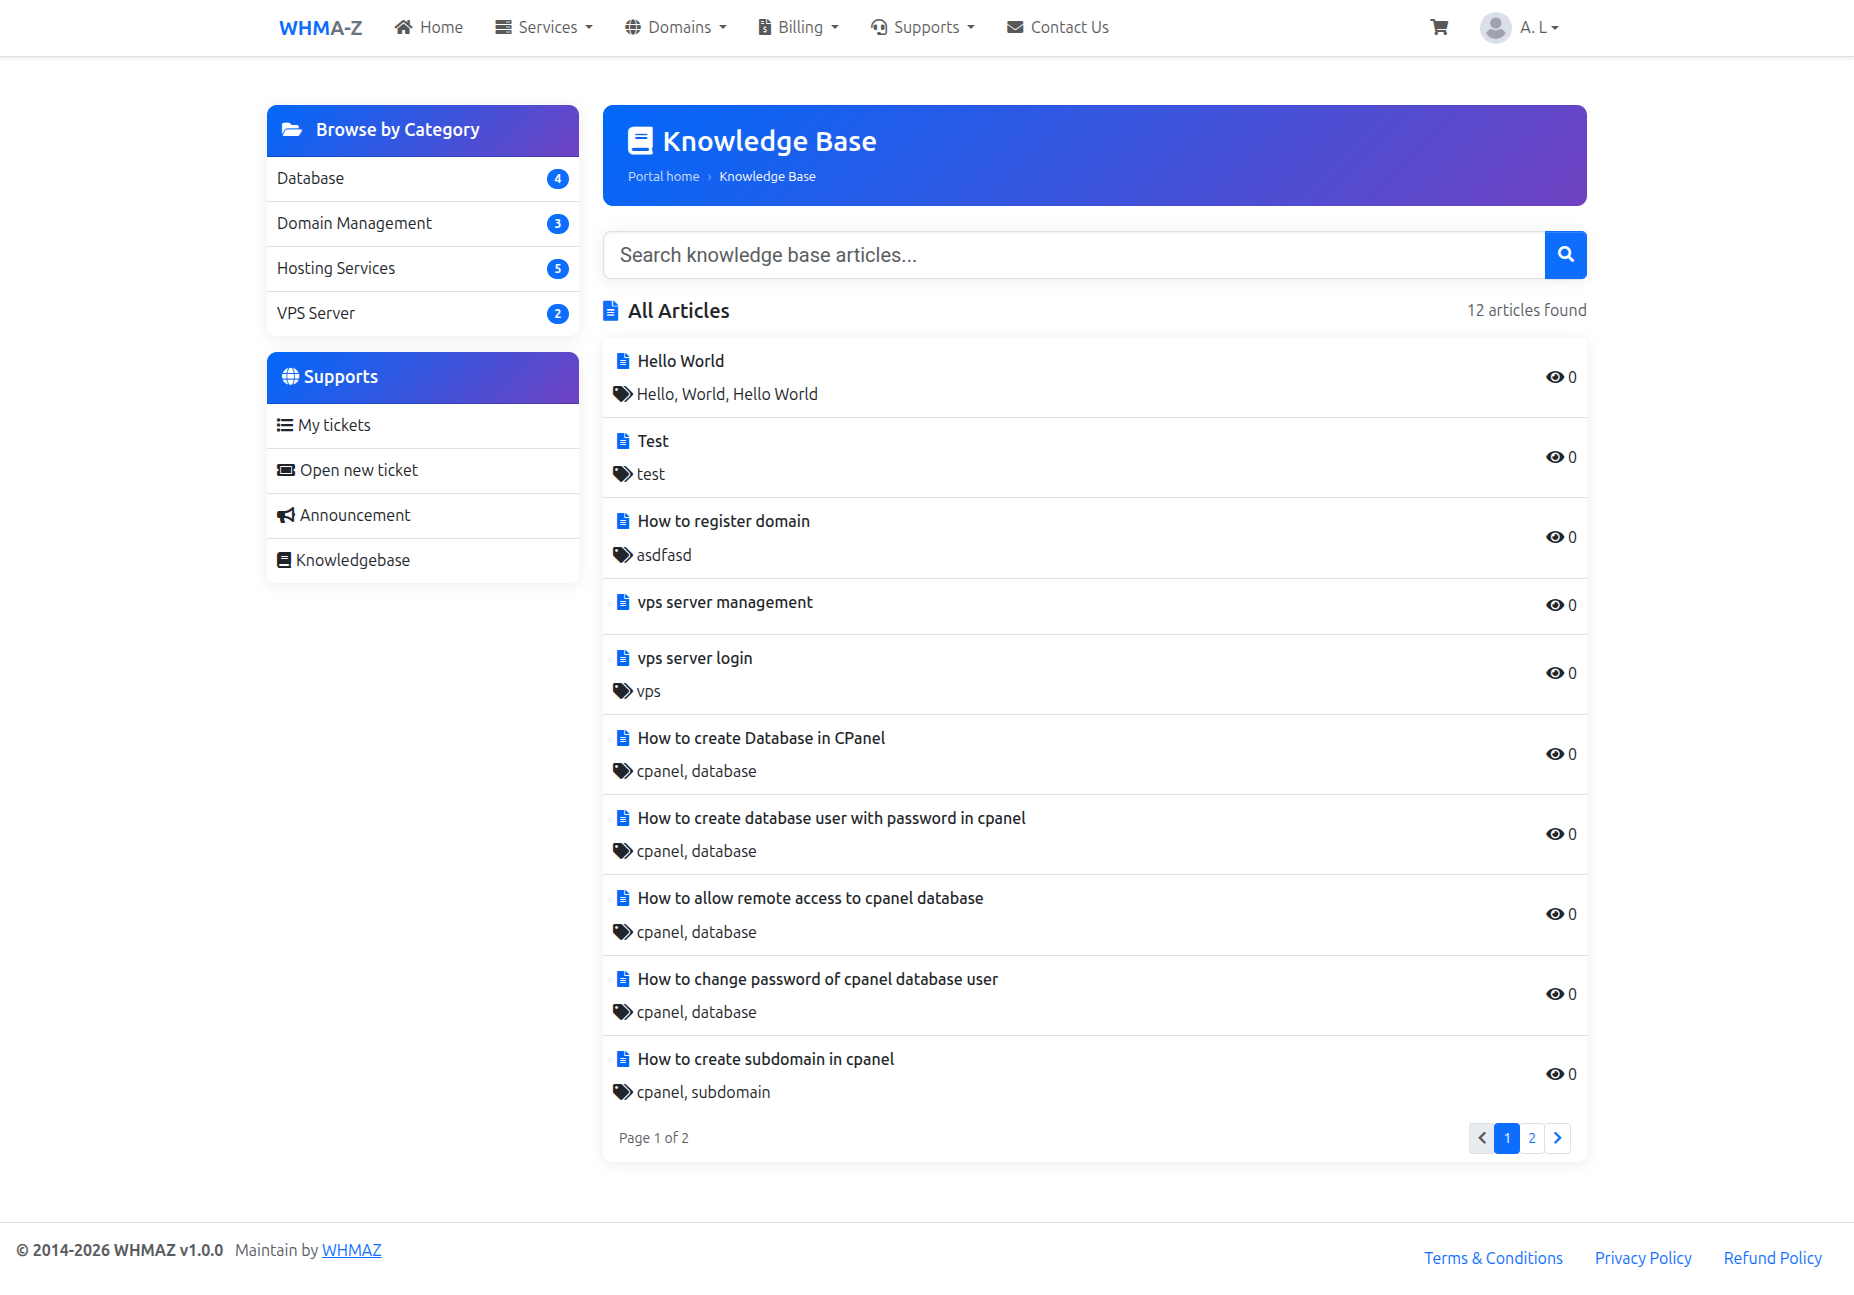
Knowledge Base
The Knowledge Base is publicly accessible without login, making it easy for visitors to find answers.
Browsing Articles
- Access Knowledge Base
- URL:
/supports/KB - No login required (public page)
- URL:
- KB List Page Features
- Search Box: Filter articles by keyword in real-time
- Category Cards: Visual grid of categories with article counts
- Article List: All articles with icons, tags, and view counts
- Sidebar: Category navigation with article counts
- Pagination: 10 articles per page with page navigation
- Browse by Category
- Click on any category card or sidebar link
- URL:
/supports/kb_category/{id}/{slug} - Shows articles filtered by that category
- Active category highlighted in sidebar
Searching for Articles
- Use Search Box
- Located at the top of the KB list page
- Enter keywords or question
- Articles filter in real-time as you type
- Results show title, tags, and view count
- Filter by Category
- Click category card in the grid
- Or use sidebar category links
- Each category shows article count
Reading Articles
Article Detail Page (/supports/view_kb/{id}/{slug}):
Article Information:
- Article title with icon
- Tags for categorization
- View count
Article Content:
- Rich formatted content
- Sanitized HTML for security
Rating System:
- "Was this article helpful?" prompt
- Thumbs up/down buttons with vote counts
- Helps identify useful content
Sidebar Navigation:
- KB category links
- Quick access to other categories
- Support navigation
Announcements
Announcements are publicly accessible without login, keeping visitors informed of important updates.
Viewing Announcements
- Access Announcements
- URL:
/supports/announcements - No login required (public page)
- URL:
- Announcement List Features
- List View: All announcements with icons and view counts
- Archive Sidebar: Year-month grouping (e.g., "February 2026 (5)")
- Pagination: 10 announcements per page
- Browse by Archive
- Click on any month in the Archive sidebar
- URL:
/supports/announcements_archive/{year}/{month} - Shows announcements from that specific month
- Active month highlighted in sidebar
Reading Announcements
Announcement Detail Page (/supports/view_announcement/{id}/{slug}):
Announcement Information:
- Title with icon
- Tags (if any)
- View count
Content:
- Full announcement content
- Sanitized HTML for security
Share Buttons:
- Facebook share
- Twitter share
- LinkedIn share
- Copy link to clipboard
Archive Navigation:
- Year-month archive links in sidebar
- Quick access to other months
- Support navigation
Contact Us
The Contact Us page allows visitors to send messages to the appropriate department without needing to login.
Accessing Contact Us Page
- Navigate to Contact Us
- URL:
/supports/contactus - No login required (public page)
- Link in footer navigation
- URL:
Contact Form Features
Modern Design:
- Clean, professional layout matching registration page
- Teal gradient header with contact icon
- Responsive design for mobile devices
- Real-time form validation
Form Fields:
- Your Name (required): Full name of the sender
- Email Address (required): Valid email for replies
- Department (required): Select from active ticket departments
- Dropdown populated from configured departments
- Each department has its own email address
- Subject (required): Brief topic of the inquiry
- Message (required): Detailed message content
Security Features:
- Google reCAPTCHA protection (if configured)
- CSRF token validation
- Input sanitization
- Email validation
Submitting a Contact Form
- Fill in Your Details
- Enter your name and email address
- These are required for the department to respond
- Select Department
- Choose the most appropriate department
- Examples: Sales, Technical Support, Billing, General Inquiry
- Enter Subject and Message
- Provide a clear subject line
- Write your detailed message or inquiry
- Complete reCAPTCHA (if displayed)
- Click the "I'm not a robot" checkbox
- Complete any additional verification if prompted
- Submit Form
- Click "Send Message" button
- Success message displayed on completion
- Email sent to selected department
What Happens After Submission
- Email is sent to the selected department's email address
- Email contains:
- Sender's name and email
- Department name
- Subject and message
- Submission timestamp
- Sender's IP address
- Department staff can reply directly to the sender's email
Best Practices
For Faster Response:
- Select the correct department
- Provide detailed information in your message
- Include any relevant account or order numbers
- Use a valid email address for replies

Part 3: Administrator Portal Guide
Admin Dashboard
Dashboard Overview
The admin dashboard provides comprehensive business insights:
Key Metrics (Top Row):
- Total Revenue: Revenue for selected period
- Active Orders: Count of active services
- Pending Invoices: Unpaid invoice count and amount
- Open Tickets: Support tickets requiring attention
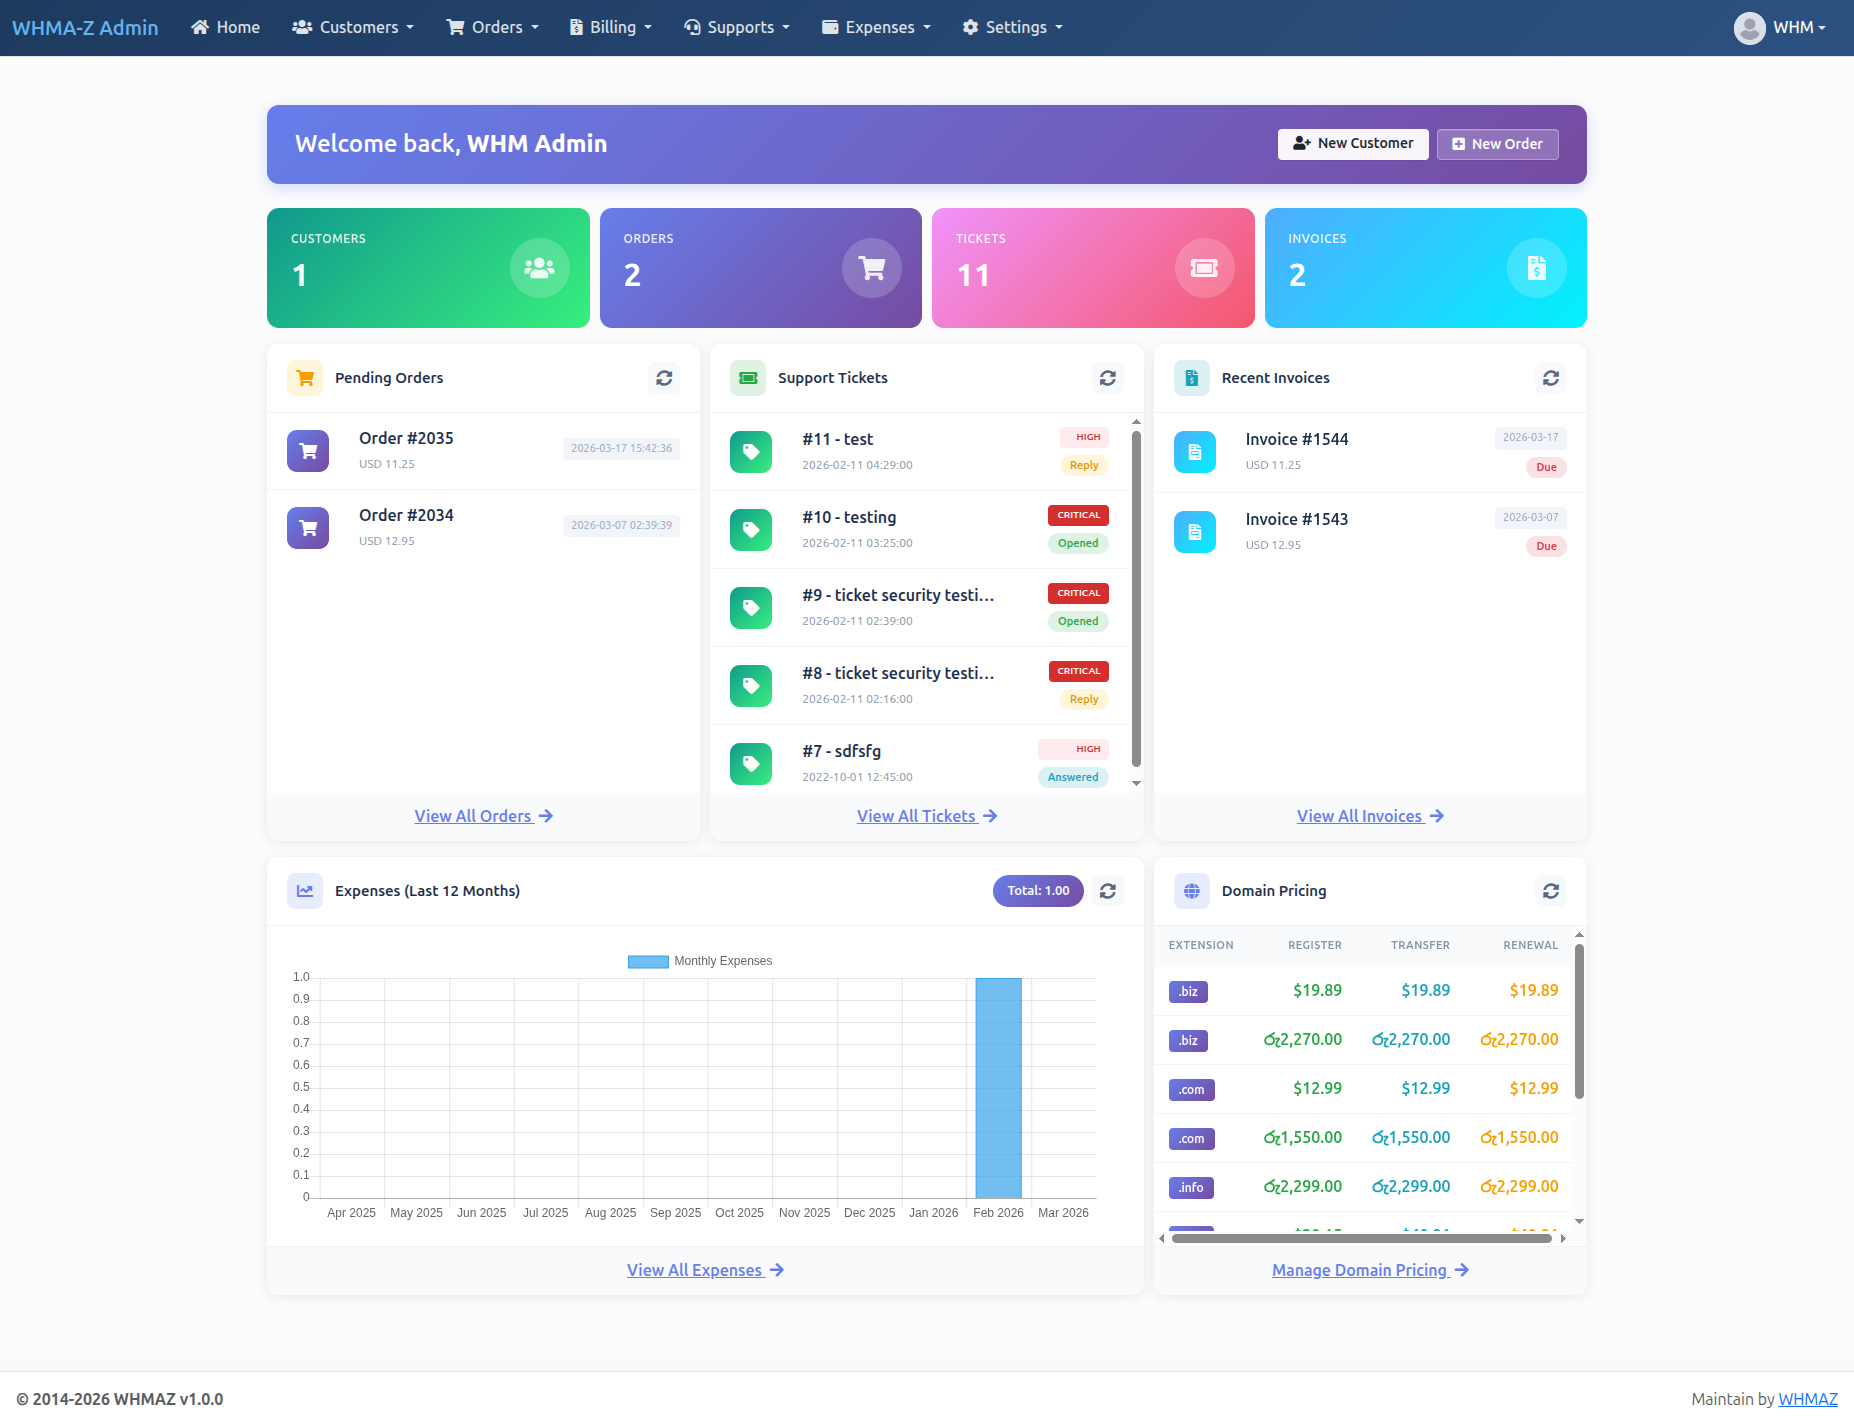
Dashboard Widgets
Summary Cards (Top Row):
- Customers: Total active customer count
- Orders: Total active orders count
- Tickets: Total open support tickets count
- Invoices: Total invoices count
Pending Orders:
- Latest pending orders list
- Order number and amount
- Payment status indicator (Paid/Due/Partial)
- Link to order details
Recent Support Tickets:
- Latest support tickets
- Priority indicator (Low/Medium/High/Critical)
- Status badges (Opened/Answered/Customer Reply/Closed)
- Quick link to ticket view
Recent Invoices:
- Latest invoices with amounts
- Due date display
- Payment status badges
- Link to invoice details
Last 12 Months Expenses (Chart):
- Interactive bar chart showing monthly expense totals
- Displays data using Chart.js visualization
- Shows total expenses sum in header
- Auto-fills missing months with zero values
- Refresh button to reload data
- Link to expenses management page
Domain Selling Prices:
- Table showing domain extension pricing
- Columns: Extension, Register, Transfer, Renewal
- Color-coded prices for easy reading
- Currency symbol from configuration
- Scrollable list (up to 10 extensions)
- Link to domain pricing management
Quick Actions
Accessible from Dashboard:
- Create New Customer
- Create New Order
- Generate Invoice
- Create Support Ticket
- Add Knowledge Base Article
- View Reports
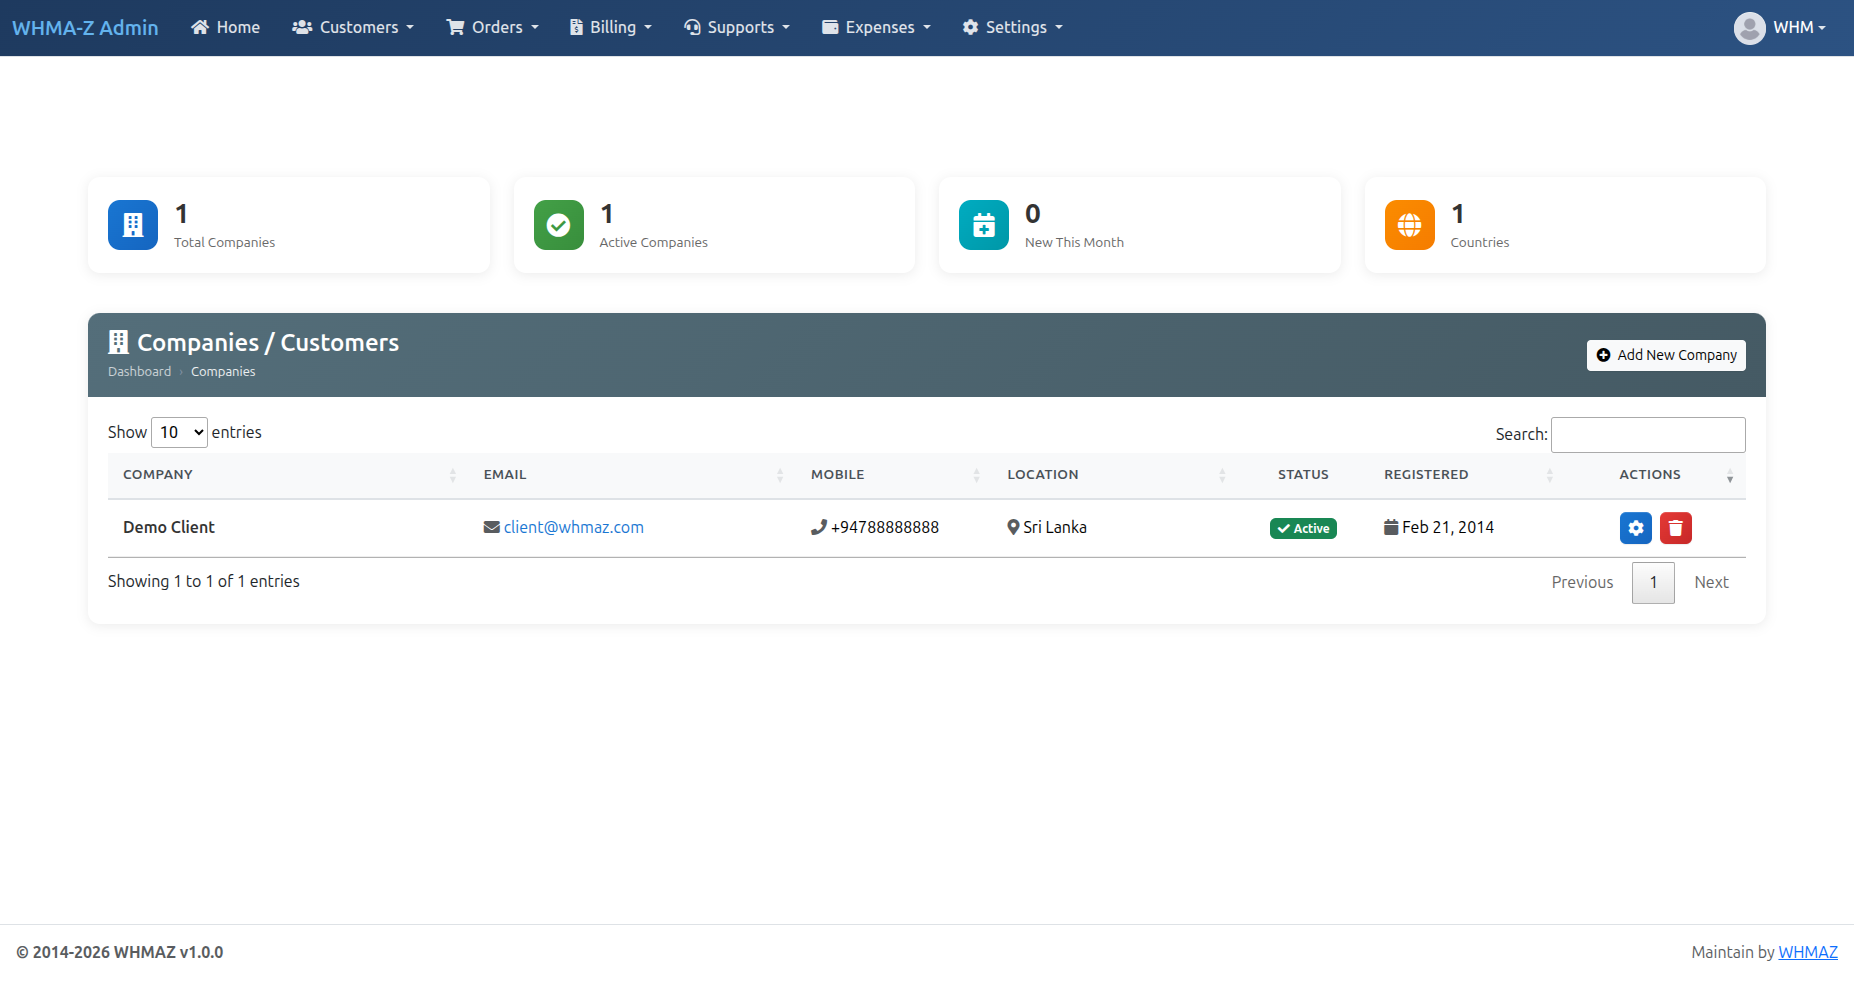
Customer Management
Customer List
- Access Customer Management
- Go to "Customers" → "Manage Customers"
- View all customer accounts
- Customer List Features
- Server-side pagination (fast for large datasets)
- Search by name, email, phone, company
- Filter by status (Active, Inactive)
- Sort by any column
- Export to CSV/Excel
Customer Details
Click on customer to view:
- Personal Information: Name, email, phone, company name, address details, tax ID, registration date
- Account Statistics: Total orders, active services, total revenue, outstanding balance, last login date
- Related Records: All orders/services, all invoices, all payments, all support tickets, notes and comments
Adding a New Customer
- Click "Add Customer" - Fill in customer form, enter all required fields
- Customer Information
- Personal Details: First Name (required), Last Name (required), Email (required, must be unique), Phone Number
- Company Information: Company Name, Tax ID/VAT Number
- Address: Street Address, City, State/Province, ZIP/Postal Code, Country
- Account Settings: Password (auto-generated or manual), Send welcome email (checkbox), Account status (Active/Inactive)
- Save Customer
- Click "Save"
- Customer account created
- Welcome email sent (if enabled)
- Customer can now login
Editing Customer Information
- Find Customer - Search in customer list, click "Edit" button
- Update Information - Modify any field except email (requires verification), update address, change status, reset password (if needed)
- Save Changes - Click "Save", customer notified of changes (if applicable)
Customer Actions
Available Actions:
- View Orders: See all customer orders
- View Invoices: See billing history
- View Tickets: See support history
- Create Order: Create order for this customer
- Generate Invoice: Create manual invoice
- Send Email: Send direct message
- Add Note: Internal notes about customer
- Login as Customer: (for troubleshooting)
- Suspend Account: Temporarily disable
- Delete Customer: Permanently remove (with confirmation)
Order Management
Order List
- Access Order Management
- Go to "Orders" → "Manage Orders"
- View all orders/services
- Order List Information
- Order ID, Customer name, Package/Service name, Amount, Billing cycle, Next due date, Status, Actions

Creating an Order (Manual)
When to Create Manual Order:
- Phone order from customer
- Offline sale
- Custom service not in catalog
- Migration from another system
Steps:
- Click "New Order" - Select customer (or create new), choose package
- Order Details - Select billing cycle, choose start date, set custom pricing (if applicable), add setup fee (if applicable)
- Service Configuration - Enter domain name, set server location, configure options, add special notes
- Pricing Override (optional) - Override standard pricing, add discounts, add custom line items
- Generate Invoice - Auto-generate invoice (checkbox), set invoice due date, send invoice to customer (checkbox)
- Save Order - Order created, invoice generated (if enabled), email sent to customer (if enabled)
Order Status Management
Order Statuses:
- Pending: Awaiting payment or approval
- Active: Service is active
- Suspended: Temporarily disabled (non-payment, violation, etc.)
- Cancelled: Service cancelled
- Fraud: Flagged for manual review
Changing Order Status:
- Open order details
- Select new status from dropdown
- Add reason/note (optional)
- Save changes
- Customer notified via email
Order Actions
Available Actions:
- Edit Order: Modify order details
- Change Package: Upgrade/downgrade
- Suspend Service: Temporarily disable
- Unsuspend Service: Reactivate
- Cancel Order: Permanently cancel
- Generate Invoice: Create renewal invoice
- View Invoices: See related invoices
- Add Notes: Internal notes
- Send Email: Notify customer
Bulk Operations
Select Multiple Orders:
- Check boxes next to orders
- Select bulk action: Suspend selected, Activate selected, Generate invoices, Send reminder emails, Export selected, Delete selected
Managing Existing Orders
The Order Management page allows administrators to view and modify existing orders, including changing registrars, servers, packages, and cancelling orders.
Accessing Order Management:
- Go to "Orders" in the admin menu
- Find the order you want to manage
- Click the gear icon (Manage) button
Order Management Page Sections:
- Order Overview - Order number and date, total amount and discounts, order status, customer information with link to profile
- Domain Items - List of all domains in the order, domain name, registrar, order type, registration and expiry dates, status badge
- Hosting Items - List of all hosting services in the order, package name, server, billing cycle, hosting domain and control panel username, status badge
Domain Actions:
- Change Registrar:
- Click "Change Registrar" on a domain
- Select the new registrar from dropdown
- Check "Initiate domain transfer" if domain is active
- Click "Save Changes"
- If domain is active, transfer will be initiated to new registrar
- Cancel Domain:
- Click "Cancel" on a domain
- Choose cancellation type: Immediate (Cancel now) or End of Period (Schedule at expiry)
- Enter cancellation reason (optional)
- Click "Cancel Domain"
Hosting Actions:
- Change Package:
- Click "Change Package" on a service
- Select new package from dropdown
- Select billing cycle/pricing
- Check "Apply package change on server" to update the control panel
- Click "Save Changes"
- Change Server:
- Click "Change Server" on a service
- Select new server from dropdown
- Select package available on new server
- Check "Migrate account" to move data to new server
- Click "Save Changes"
- Cancel Service:
- Click "Cancel" on a service
- Choose cancellation type: Immediate or End of Period
- Check "Delete server account" for immediate deletion
- Enter cancellation reason (optional)
- Click "Cancel Service"
Cancel Entire Order:
- Click "Cancel Entire Order" button
- Choose cancellation type: Immediate or End of Period
- Enter cancellation reason (optional)
- Click "Cancel Order"
What Happens When Order is Cancelled:
- All domain items are cancelled
- All hosting services are terminated
- All unpaid invoices are automatically cancelled
- Invoice status changes to "CANCELLED"
- Cancellation reason is recorded
Status Indicators:
| Domain Status | Description |
|---|---|
| Pending Registration | Awaiting domain registration |
| Active | Domain is registered and active |
| Expired | Domain has expired |
| Grace Period | Domain in grace period after expiry |
| Cancelled | Domain cancelled |
| Pending Transfer | Transfer in progress |
| Service Status | Description |
|---|---|
| Pending | Awaiting setup/activation |
| Active | Service is active |
| Expired | Service has expired |
| Suspended | Service temporarily suspended |
| Terminated | Service permanently terminated |
Package Management
Package List
- Access Packages
- Go to "Products" → "Packages"
- View all hosting packages
- Package Information
- Package name, Package group/category, Pricing, Status (Active/Hidden), Order (display order)
Creating a Package
- Click "Add Package" - Open package creation form
- Basic Information
- Package Name: Display name (e.g., "Starter Hosting")
- Package Group: Category (Shared, VPS, Dedicated, etc.)
- Description: Detailed description
- Features: Bullet points of features
- Status: Active (visible) or Hidden
- Specifications
- CPU Cores: Number of CPU cores
- RAM: Memory allocation (MB/GB)
- Disk Space: Storage allocation (GB/TB)
- Bandwidth: Monthly transfer limit (GB/TB/Unlimited)
- Email Accounts: Number allowed
- Databases: Number allowed
- Subdomains: Number allowed
- FTP Accounts: Number allowed
- Pricing
- Setup Fee: One-time setup cost
- Monthly Price: Recurring monthly cost
- Quarterly Price: 3-month pricing
- Semi-Annual Price: 6-month pricing
- Annual Price: 12-month pricing
- Bi-Annual Price: 24-month pricing
- Tri-Annual Price: 36-month pricing
- Additional Options
- Allow Upgrades: Can customers upgrade?
- Allow Downgrades: Can customers downgrade?
- Auto-Setup: Automatically provision?
- Welcome Email: Send welcome email?
- Order: Display position (lower = higher priority)
- Save Package - Click "Save", package available for ordering, appears in customer portal (if Active)
Editing Packages
- Find Package - Locate in package list, click "Edit"
- Modify Details - Update any field, change pricing, modify features, adjust specifications
- Price Changes - New prices apply to new orders only, existing orders keep original pricing, can manually adjust existing orders if needed
- Save Changes - Click "Save", changes effective immediately
Package Groups
Organizing Packages:
- Create package groups (categories)
- Group related packages
- Examples: Shared Hosting, VPS Hosting, Dedicated Servers, Reseller Hosting, Email Hosting
Managing Groups:
- Create new group
- Edit group name
- Set group display order
- Hide/show entire group
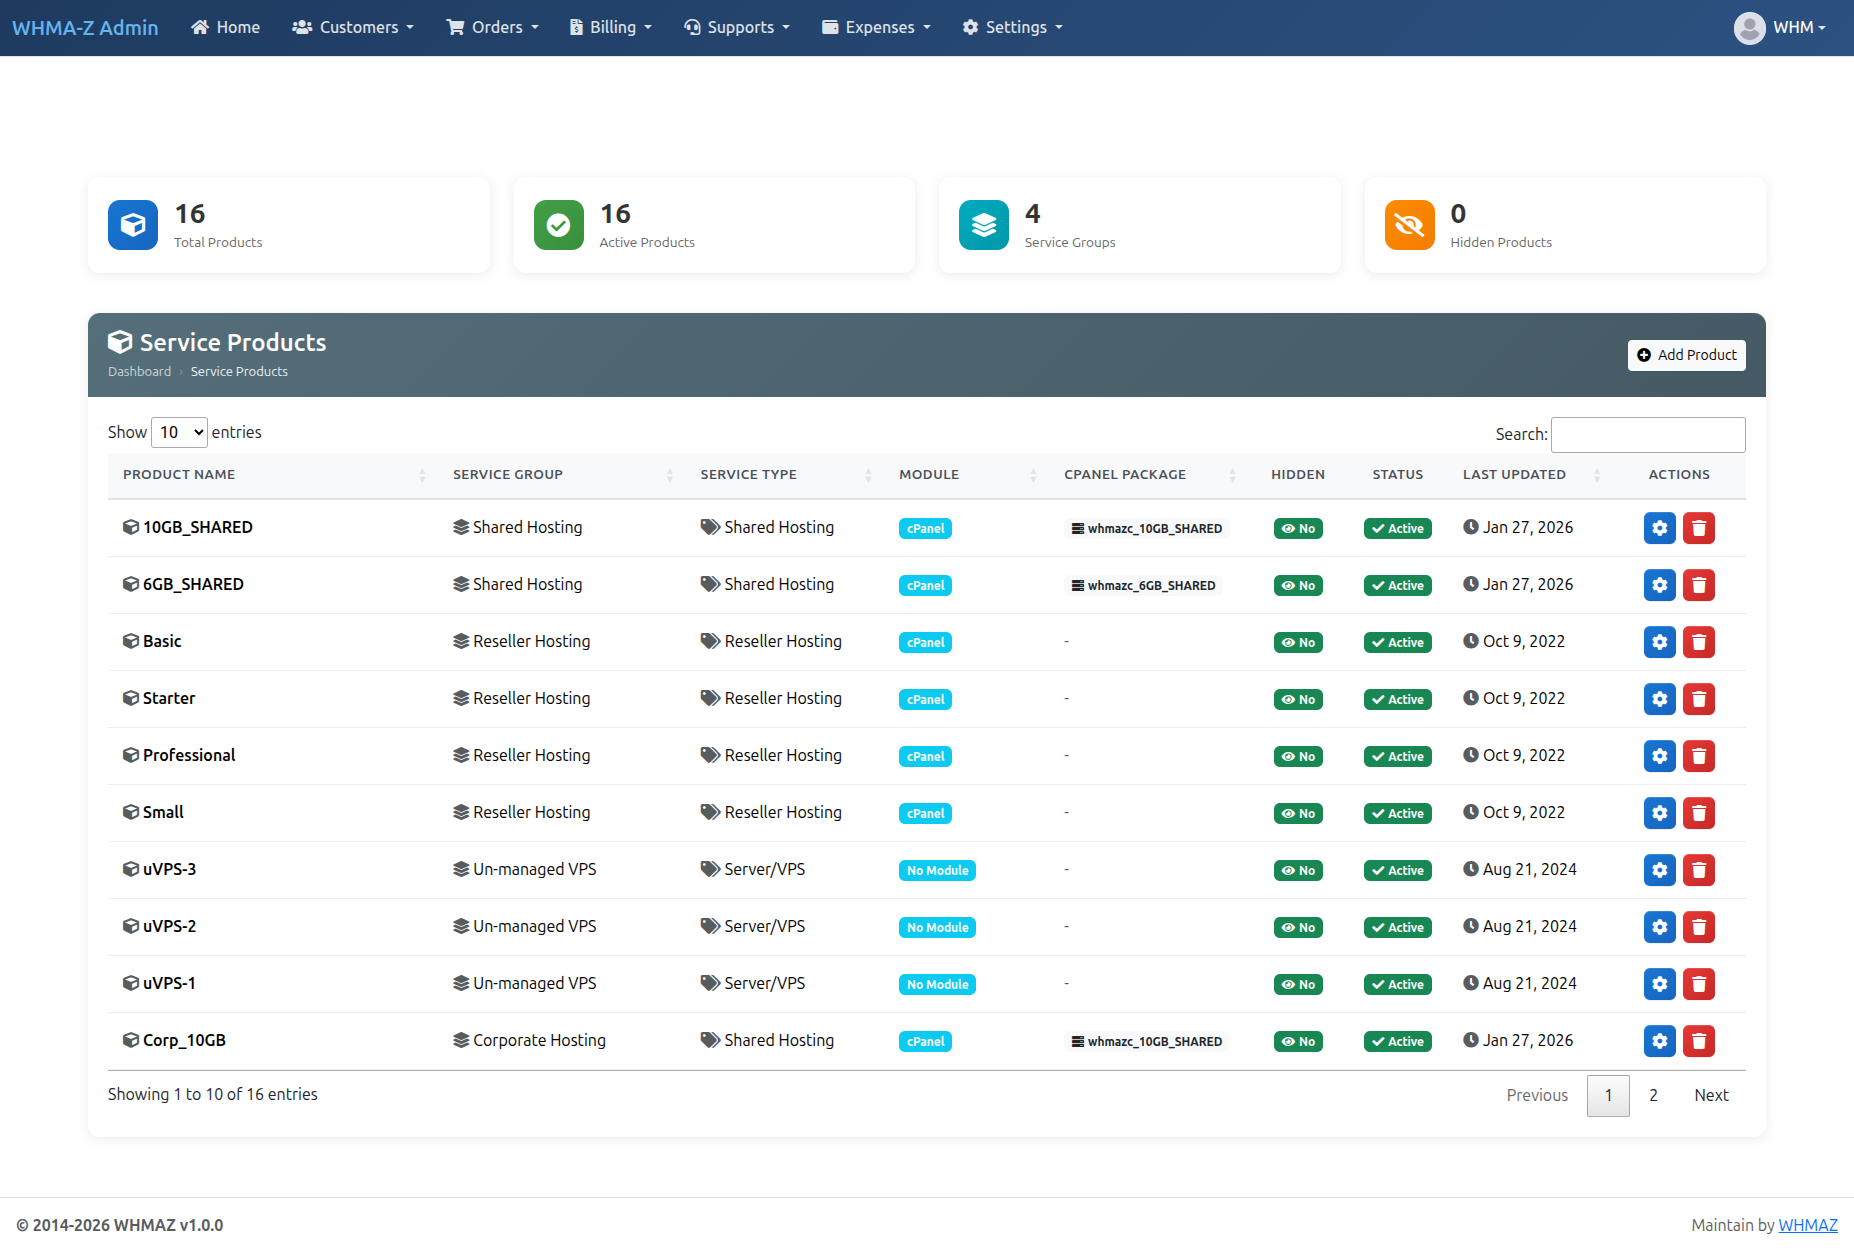
Service Product Management
Service Product List
- Access Service Products
- Go to "Products" → "Service Products"
- View all service products with server-side pagination
- Product List Information
- Product name, Service group, Service type (Shared Hosting, Reseller Hosting, VPS, etc.), Module (cPanel, Plesk, DirectAdmin), Server package (if applicable), Hidden/Active status, Last updated date, Actions (Manage, Delete)
Creating a Service Product
- Click "Add" - Opens the service product creation form
- Basic Information
- Product Name: Display name (e.g., "Basic Shared Hosting")
- Service Group: Select from configured service groups (type is derived from group)
- Module: Select provisioning module (cPanel, Plesk, DirectAdmin) -- filters available servers
- Server: Select which server hosts this product (filtered by selected module)
- Hidden: Check to hide product from client area
- Server Package Selection (when module is cPanel, Plesk, or DirectAdmin)
- After selecting a module and server, a dynamic dropdown loads available packages from the server API
- Works with all supported control panels (cPanel/WHM, Plesk, DirectAdmin)
- Selecting a package auto-fills the Product Description with package details: Disk Space, Bandwidth, Max Addon Domains, Max Subdomains, Max FTP Accounts, Max Email Accounts, Max Databases, Shell Access, CGI Access
- Product Description
- Rich text description of the product
- Auto-populated from server package details (editable)
- Displayed to customers when ordering
- Save Product - Click "Save", product available for assignment to orders
Editing Service Products
- Find Product - Search in the product list, click "Manage" button (wrench icon)
- Modify Details - Update any field, change service group, type, or module, re-select server package if needed, toggle hidden status
- Save Changes - Click "Save", changes effective immediately
Deleting Service Products
- Click the "Delete" button (trash icon) in the product list
- Confirm deletion in the popup dialog
- Products are soft-deleted (can be recovered from database)
Email Template Management
Overview
Email Template Management allows you to create, edit, and manage all email templates used throughout the system. Templates support rich text editing via the Quill editor and a placeholder system for dynamic content.
Access: whmazadmin/email_template
Email Template List
- Access Email Templates
- Go to "Settings" → "Email Templates"
- View all templates with server-side pagination
- Template List Columns
- Template Name, Template Key (unique identifier, displayed in
codeformat), Subject, Category (color-coded badge), Status (Active/Inactive), Last Updated, Actions (Edit, Delete)
- Template Name, Template Key (unique identifier, displayed in
- Category Color Codes
- DUNNING -- Yellow/Warning badge
- INVOICE -- Blue/Info badge
- ORDER -- Primary badge
- AUTH -- Secondary badge
- SUPPORT -- Green/Success badge
- SERVICE -- Teal badge
- GENERAL -- Dark badge
Creating an Email Template
- Click "Add" - Opens the email template form
- Template Information
- Template Name: Display name (e.g., "First Payment Reminder")
- Template Key: Unique identifier used in code (e.g.,
dunning_first_reminder). Must be alphanumeric with underscores/dashes only. Cannot be duplicated. - Category: Select from DUNNING, INVOICE, ORDER, SERVICE, SUPPORT, AUTH, or GENERAL
- Subject: Email subject line (supports placeholders)
- Status: Active checkbox (checked = active)
- Email Body
- Rich text editor (Quill) with formatting toolbar
- Supports: bold, italic, underline, strikethrough, lists, links, colors, alignment, and more
- Write your email content with placeholders for dynamic data
- Available Placeholders
{client_name}-- Customer's full name{invoice_no}-- Invoice number{amount_due}-- Outstanding amount{due_date}-- Invoice due date{days_overdue}-- Number of days past due{invoice_url}-- Direct link to the invoice{currency}-- Currency symbol/code{site_name}-- Your website/company name{site_url}-- Your website URL
- Save Template - Click "Save", template available for use in the system
Editing Email Templates
- Search or browse in the template list, click "Manage" button (wrench icon)
- Update any field except template_key, edit the email body using the Quill editor, toggle active status
- Click "Save", changes effective immediately
Deleting Email Templates
- Click the "Delete" button (trash icon) in the template list
- Confirm deletion in the SweetAlert2 popup dialog
- Templates are soft-deleted (can be recovered from database)
Default Templates
The system comes with 12 pre-configured email templates:
| Template Key | Category | Purpose |
|---|---|---|
dunning_first_reminder | DUNNING | First payment reminder |
dunning_second_reminder | DUNNING | Second payment reminder |
dunning_final_notice | DUNNING | Final notice before action |
dunning_suspension_notice | DUNNING | Service suspension notification |
dunning_termination_notice | DUNNING | Service termination notification |
invoice_generated | INVOICE | New invoice notification |
invoice_payment_confirmation | INVOICE | Payment received confirmation (sent to customer) |
admin_payment_notification | INVOICE | Payment received notification (sent to admin) |
order_confirmation | ORDER | Order placed confirmation |
auth_welcome | AUTH | Welcome email for new customers |
auth_password_reset | AUTH | Password reset instructions |
Automatic Payment Confirmation Emails
When a customer successfully pays an invoice, the system automatically sends confirmation emails:
Customer Email (invoice_payment_confirmation):
- Sent to: Customer's email address
- Contains: Invoice number, amount paid, payment method, transaction ID, payment date
- Triggered: When invoice status changes to PAID
Admin Email (admin_payment_notification):
- Sent to: Admin email from app_settings
- Contains: Customer details, invoice info, payment details, link to view invoice
- Triggered: When
notify_admin_paymentis enabled in Settings → Notifications - Can be disabled via Settings → Notifications → "Notify on payment received"
Available Placeholders:
| Placeholder | Description |
|---|---|
{client_name} | Customer's full name |
{company_name_customer} | Customer's company name |
{client_email} | Customer's email |
{invoice_no} | Invoice number |
{amount} | Payment amount |
{currency_symbol} | Currency symbol (e.g., $) |
{payment_method} | Payment method used |
{gateway_name} | Payment gateway name |
{transaction_id} | Transaction/reference ID |
{payment_date} | Date and time of payment |
{company_name} | Your company name |
{admin_invoice_url} | Admin link to view invoice |
Dynamic Pages Management
Overview
Dynamic Pages Management allows you to create and manage content pages like Terms & Conditions, Privacy Policy, and Refund Policy. The system includes version history with restore functionality, SEO settings, and public page viewing without login.
Access: whmazadmin/pages
Page List
- Access Dynamic Pages - Go to "Settings" → "Dynamic Pages", view all pages with server-side pagination
- Stats Cards - Total Pages, Published, Drafts, Total Views
- Page List Columns - Page Title (with system page lock icon), URL Slug (in code format), Views count, Published status (toggle switch), Last Updated date, Sort Order, Actions (Edit, History, Delete)
- Quick Actions - Toggle publish/unpublish directly from list, system pages show lock icon and cannot be deleted
Creating a Page
- Click "Add Page" - Opens the page creation form
- Page Details Section
- Page Title: Display title (e.g., "Terms and Conditions")
- URL Slug: URL-friendly identifier. Auto-generated from title if left blank.
- Sort Order: Display position (lower numbers appear first)
- Published: Toggle to make page publicly visible
- SEO Settings Section
- Meta Title: SEO title (defaults to page title if blank)
- Meta Description: Brief description for search engines (150-160 characters recommended)
- Meta Keywords: Comma-separated keywords
- Page Content Section - Rich text editor (Quill) with full formatting toolbar
- Save Page - Click "Create Page" or "Update Page", page available at
/pages/{slug}if published
Editing Pages
- Find page in list, click "Edit" button (gear icon)
- Page Statistics Sidebar (edit mode) - Total Views, Created date, Last Updated
- Recent Changes Sidebar - Last 5 versions, change type badges, "View All" link
- Modify content, toggle publish status, update SEO settings
- Click "Update Page", new version saved to history
Version History
- Access History - From page list: click "History" button, from edit page: click "View All"
- Current Version Card - Shows current live page info with "Live" badge
- Version Timeline - All versions as cards with version number, change type, changed by user, content preview
- View Version - Modal shows full version details
- Restore Version - Click "Restore", confirmation dialog, page restored, new history entry created
System Pages
What are System Pages?
- Pre-installed pages that cannot be deleted
- Marked with lock icon in list
- Default system pages: Terms and Conditions, Privacy Policy
System Page Restrictions: Cannot be deleted, URL slug cannot be changed, can still edit content, SEO settings, and publish status
Public Page Viewing
Page URLs:
- Format:
https://yourdomain.com/pages/{slug} - Examples:
/pages/terms-and-conditions,/pages/privacy-policy,/pages/refund-policy
No Login Required: Published pages accessible to all visitors, uses customer portal header/footer, clean professional design, breadcrumb navigation, mobile-responsive layout.
View Counter: Each page view increments counter, stats visible in admin list and page edit.
Footer Links
Updated Footers: Client portal footer includes page links, admin portal footer includes page links (opens in new tab). Default Links: Terms & Conditions, Privacy Policy, Refund Policy.
Dunning Rules Management
Overview
Dunning rules automate the process of collecting overdue payments by defining a sequence of actions (email reminders, service suspension, termination) that occur at specified intervals after an invoice becomes overdue.
Access: whmazadmin/general_setting/manage?tab=dunning
Accessing Dunning Rules
- Navigate to General Settings - Go to "Settings" → "General Settings", click the "Dunning" tab
- Dunning Tab Overview - Information alert, "Manage Email Templates" shortcut, "Add Rule" button, rules table, workflow preview card
Creating a Dunning Rule
- Click "Add Rule" - Opens the dunning rule modal dialog
- Rule Configuration
- Step Number: Sequential order (must be unique)
- Days After Due: Number of days after invoice due date to trigger
- Action Type: EMAIL (send reminder), SUSPEND (suspend service), or TERMINATE (terminate service)
- Email Template: Select dunning email template (shown when action involves email)
- Active: Checkbox to enable/disable
- Save Rule - Click "Save", workflow preview updates
Action Type Color Codes
- EMAIL -- Blue badge
- SUSPEND -- Yellow/Warning badge
- TERMINATE -- Red/Danger badge
Editing Dunning Rules
- Click Edit (pencil icon) on the rule row
- Modal opens pre-filled, modify any field
- Click "Save"
Deleting Dunning Rules
- Click Delete (trash icon) on the rule row
- Confirm deletion in the SweetAlert2 popup
- Rule permanently removed
Workflow Preview
The Dunning tab includes a visual workflow preview card that shows all active rules in sequence, color-coded by action type.
Example Dunning Configuration
| Step | Days After Due | Action | Template |
|---|---|---|---|
| 1 | 3 days | First Payment Reminder | |
| 2 | 7 days | Second Payment Reminder | |
| 3 | 14 days | Final Notice | |
| 4 | 21 days | SUSPEND | Suspension Notice |
| 5 | 30 days | TERMINATE | Termination Notice |
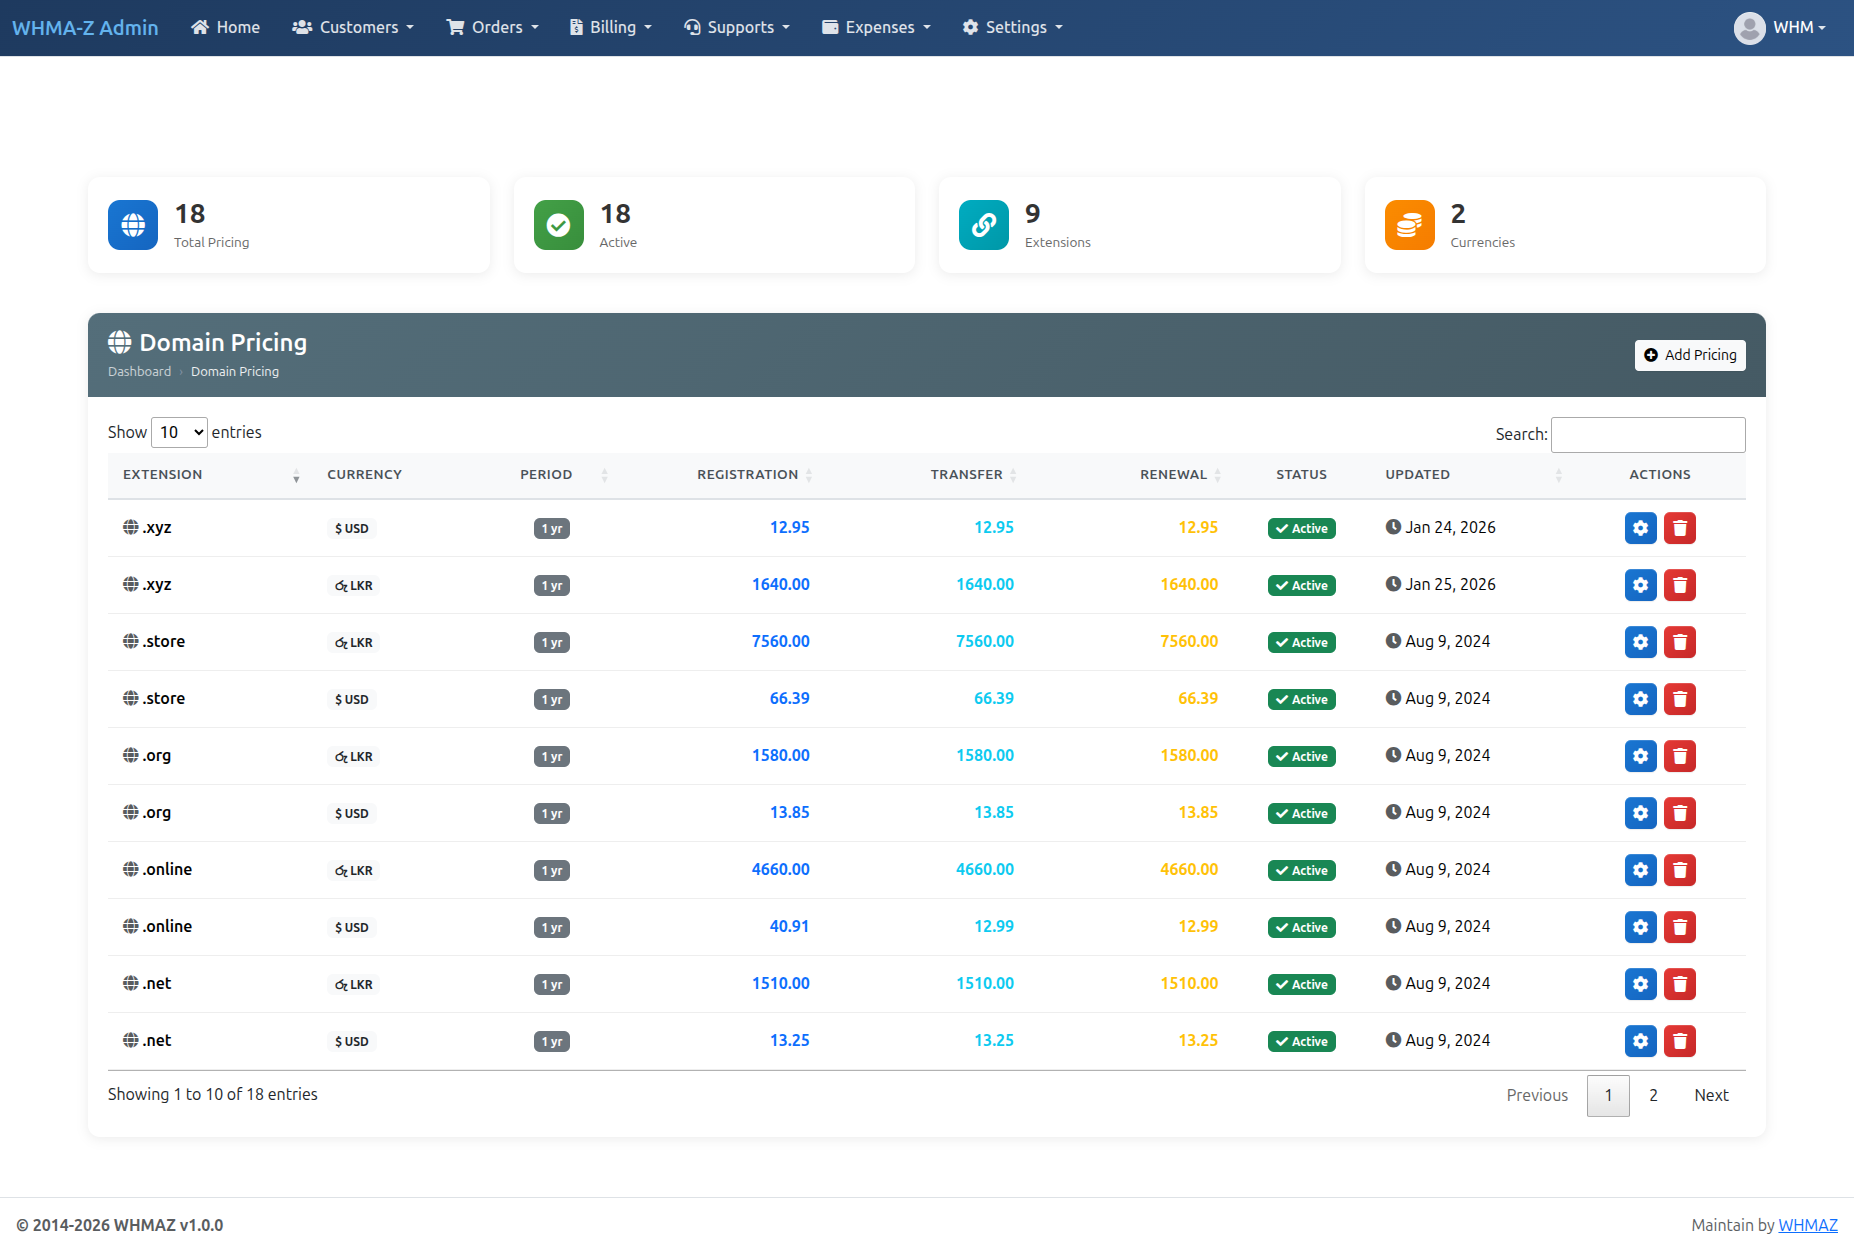
Domain Pricing Management
Accessing Domain Pricing
- Navigate to Domain Pricing - Go to "Domains" → "Domain Pricing", view all TLD pricing configurations
- Pricing List Display - Domain extension, Currency, Registration period, Registration price, Transfer price, Renewal price, Status
Adding Domain Pricing
- Click "Add Pricing" - Opens pricing configuration form
- Select Extension - Choose from available TLDs (.com, .net, .org, .info, .biz)
- Select Currency - Choose currency (USD, EUR, GBP)
- Set Registration Period - Number of years (typically 1-10)
- Configure Pricing - Registration Price, Transfer Price, Renewal Price
- Save Pricing - Click "Save", pricing active immediately
Editing Domain Pricing
- Locate pricing entry using search or filter
- Click "Edit", modify any price field
- Save changes -- new pricing applies to new orders immediately, existing orders unaffected
Managing TLD Extensions
Domain Extensions Table: Located in database dom_extensions, contains available TLDs, enable/disable specific TLDs.
Adding New TLD:
- Insert into
dom_extensionstable - Add pricing in Domain Pricing page
- TLD appears in domain search
Popular TLDs: .com, .net, .org, .info, .biz, .name, .io, .co, .me, and country codes (.us, .uk, .ca, etc.)
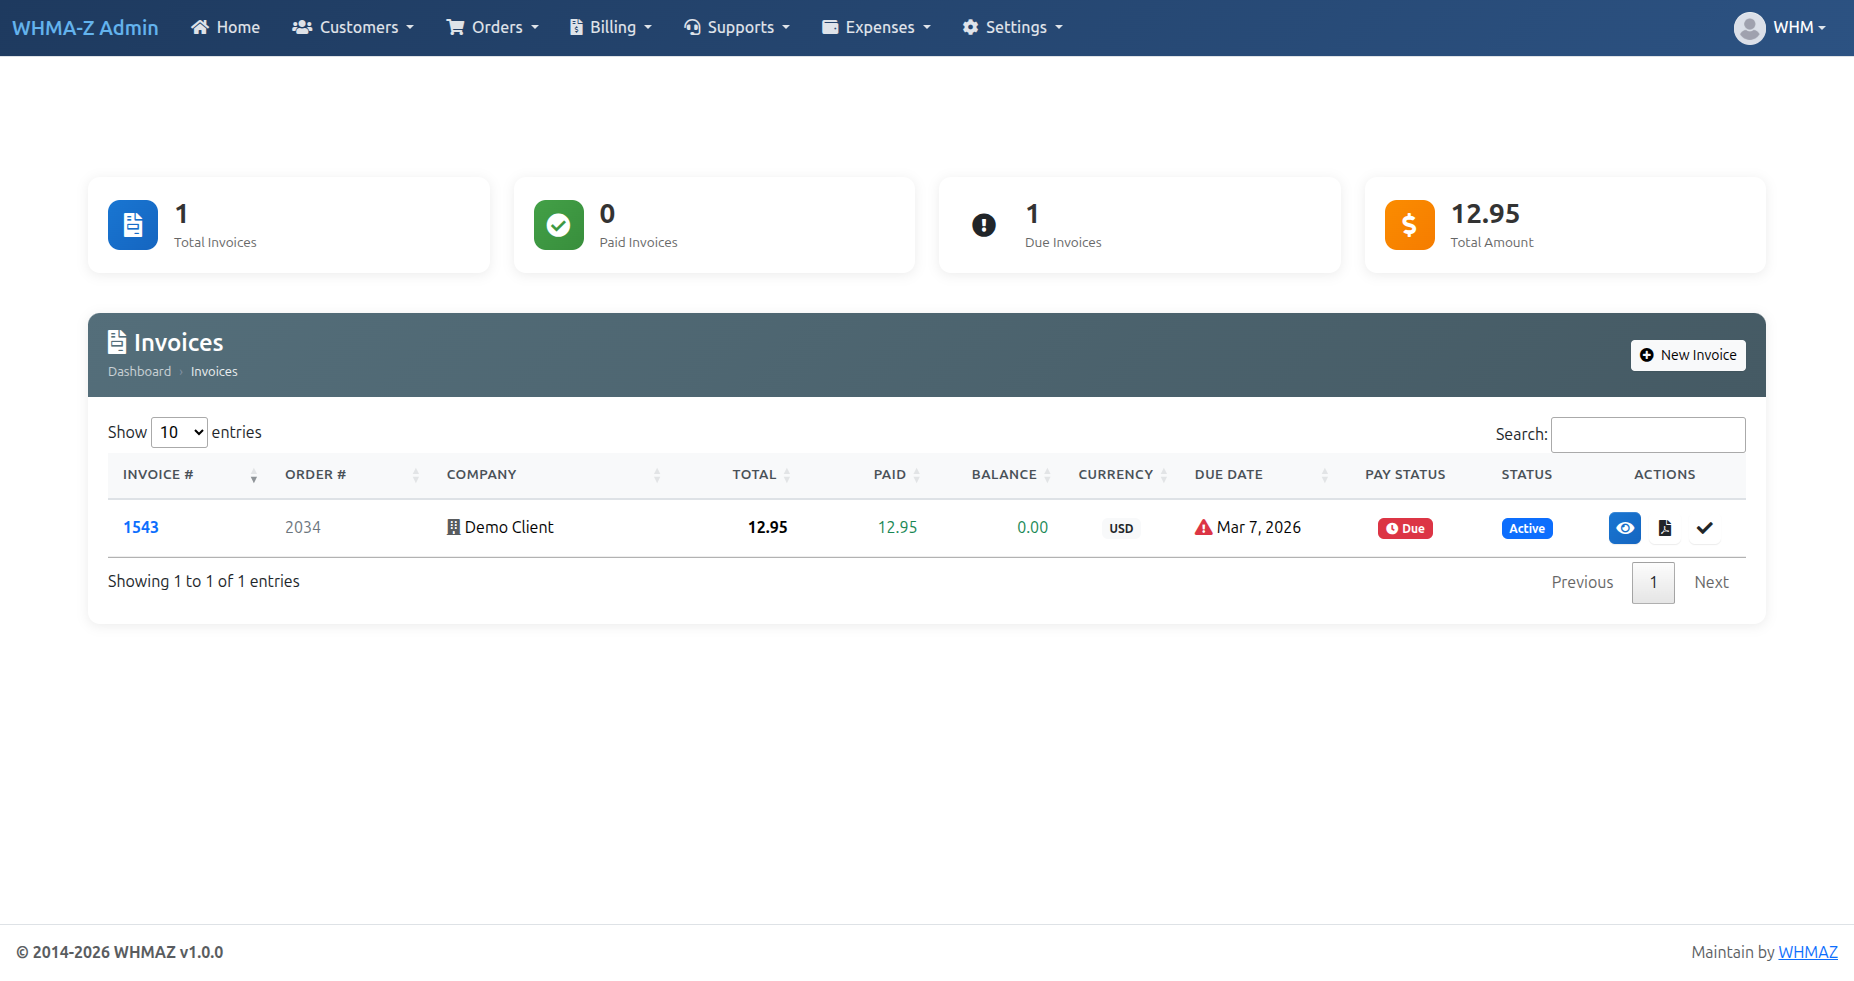
Invoice Management
Invoice List
- Access Invoice Management - Go to "Billing" → "Invoices", view all invoices
- Invoice List Columns - Invoice number, Customer name, Invoice date, Due date, Total amount, Status (Paid, Unpaid, Cancelled), Actions
Creating Manual Invoice
When to Create Manual Invoice: Custom service not in system, one-time charge, adjustment or credit, offline sale.
Steps:
- Click "Create Invoice" - Select customer, set invoice date and due date
- Add Line Items - Click "Add Item", enter description, amount, quantity, tax
- Invoice Totals - Subtotal calculated automatically, tax calculated, total displayed
- Notes (optional) - Customer-visible notes and internal admin notes
- Save Invoice - Click "Save", option to send to customer
Editing Invoices
Editing Allowed for: Unpaid invoices only. Can modify line items, change amounts, adjust due date.
Cannot Edit: Paid invoices (read-only). Use credit notes instead for corrections.
Recording Payments
Manual Payment Recording: For offline payments (cash, check, wire transfer) or payments received outside system.
- Open unpaid invoice
- Click "Record Payment" - enter amount, payment method, transaction ID, date, notes
- Save Payment - invoice marked as paid, payment recorded, customer notified
Invoice Actions
Available Actions: View Invoice, Edit Invoice, Send Invoice, Record Payment, Download PDF, Cancel Invoice, Delete Invoice
Recurring Invoices
Automatic Invoice Generation: System generates invoices before service expiration, configured in cron jobs, typically 7-14 days before due date.
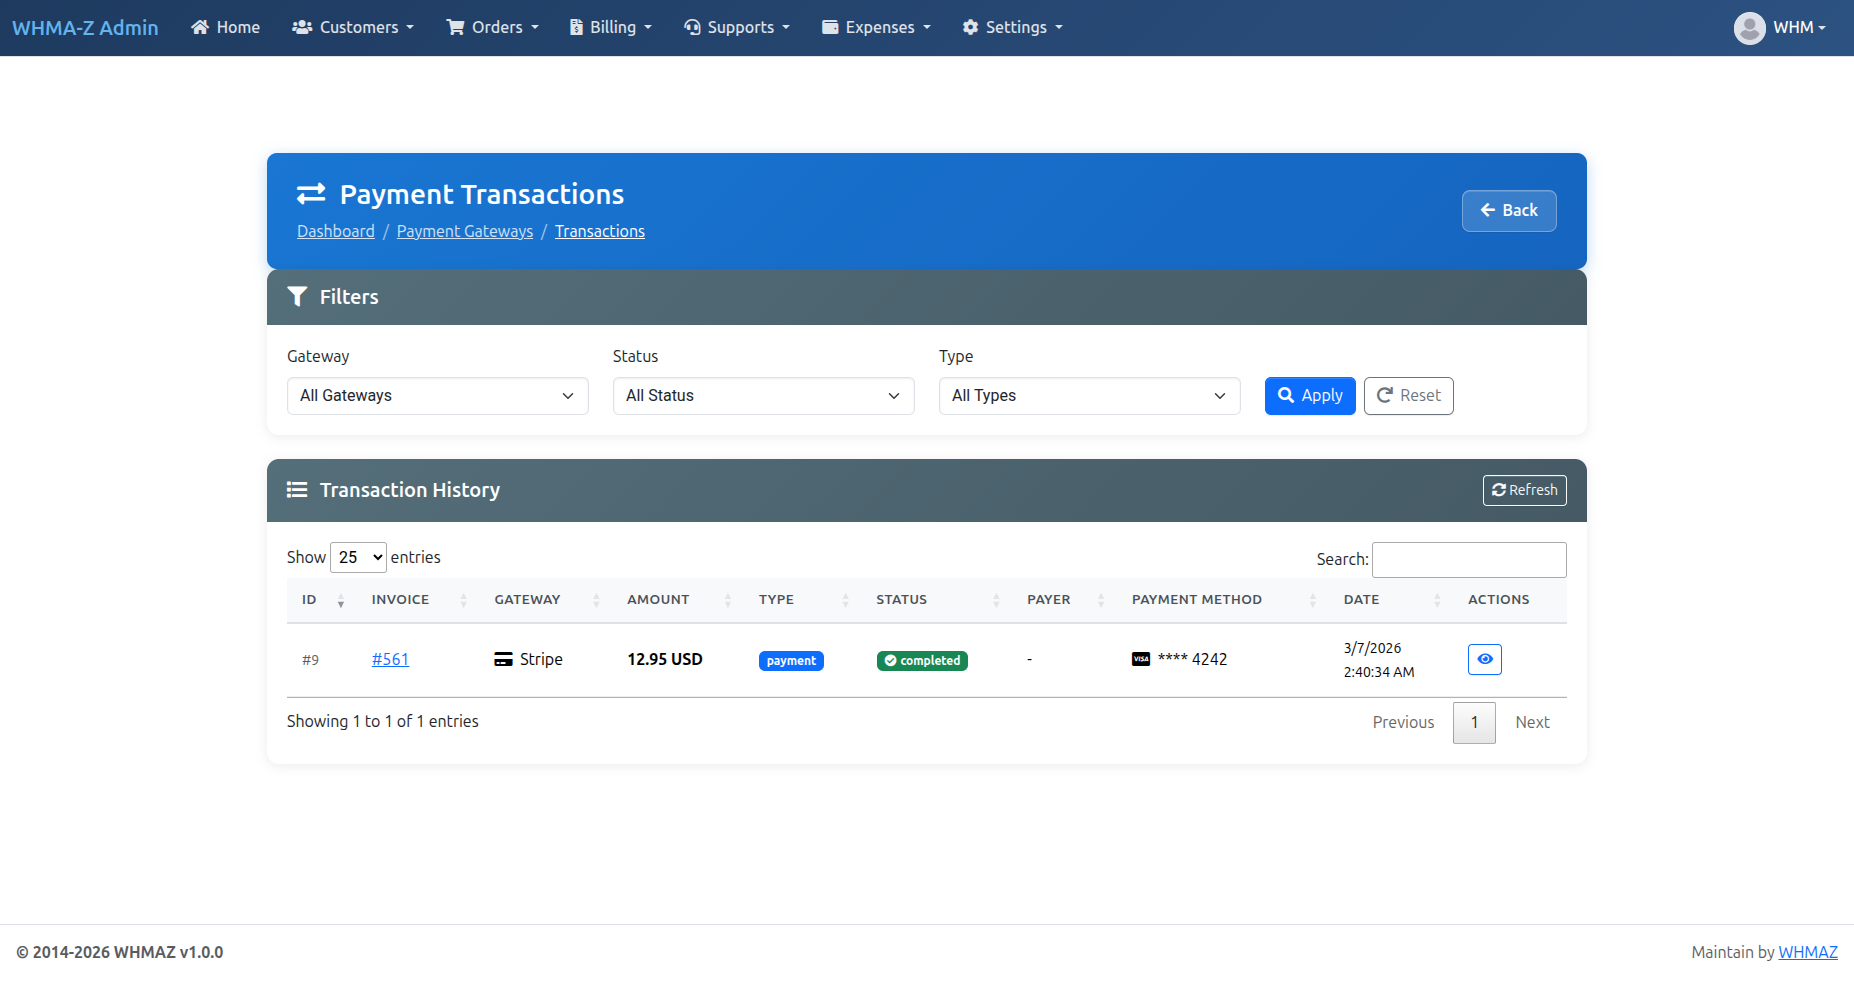
Payment Management
Transaction History
- View All Transactions - Go to "Billing" → "Transactions", see all payment records
- Transaction Information - Transaction ID, Customer name, Invoice number, Amount, Payment method, Transaction date, Status (Success, Pending, Failed, Refunded)
Payment Methods
Configure Payment Gateways: Go to "Settings" → "Payment Gateways"
Gateway List Page Features:
- Toggle Status: Enable/disable gateways with confirmation dialog
- Test Connection: Test API connectivity for Stripe
- Configure: Set up API keys, webhook secrets, and gateway settings
- Mode Indicator: Shows Test/Live mode status
- Supported Currencies: View configured currencies per gateway
| Action | Description |
|---|---|
| Toggle Switch | Enable/disable gateway (with confirmation) |
| Configure Button | Open gateway settings page |
| Test Button | Verify API credentials work correctly |
| Gateway | Status | Features |
|---|---|---|
| Stripe | Fully Working | Cards, webhooks, refunds |
| SSLCommerz | Fully Working | Bangladesh payments, IPN |
| Bank Transfer | Working | Manual payment recording |
Additional Admin Pages:
- Transactions: View all payment transactions with filtering
- Webhook Logs: Monitor incoming webhook events and processing status
Refunding Payments
- Find Transaction - Locate in transaction history, click to view details
- Process Refund - Click "Refund", enter refund amount (full or partial), enter reason, confirm
- Refund Processing - Processed through payment gateway, transaction updated to "Refunded", customer notified, invoice status updated
Promo Code Management
Overview
The Promo Code system allows administrators to create discount coupons that customers can apply during checkout. Promo codes support flexible discount rules, targeting options, and usage limits.
Access: Go to "Settings" → "Promo Codes"
Creating a Promo Code
- Navigate to Promo Codes - Go to "Settings" → "Promo Codes", click "Add Promo Code"
- Basic Information
- Promo Code: Enter a code (auto-uppercase) or click the random generator button
- Description: Optional internal note for this promo code
- Discount Settings
- Discount Type: Fixed Amount or Percentage
- Discount Value: The discount amount or percentage
- Currency: (Fixed type only) Restrict to a specific currency, or "Any Currency"
- Max Discount Cap: (Percentage only) Maximum discount amount; 0 = no cap
- Min Order Amount: Minimum cart total required; 0 = no minimum
- Validity Period
- Lifetime: Check to make the code never expire
- Start Date / End Date: Set a date range when the code is valid
- Usage Limits
- Max Total Uses: Total redemptions allowed; 0 = unlimited
- Max Uses Per Customer: Redemptions per customer; 0 = unlimited
- Targeting
- All Orders: Code applies to any order
- Specific Products: Select products from multi-select dropdown
- Specific Customers: Select customers from multi-select dropdown
- Status - Active: Enable or disable the promo code
- Click "Save Promo Code"
Managing Promo Codes
List Page Features:
- Stats Cards: Total codes, Active, Expired, Total Redemptions
- DataTables: Server-side pagination with search and sorting
- Toggle Switch: Enable/disable codes directly from the list
- Edit: Click the gear icon to modify a promo code
- Delete: Soft delete (code is deactivated, not removed from database)
How Customers Use Promo Codes
- Customer adds items to the shopping cart
- In the cart view, a "Promo Code" section appears between cart items and payment options
- Customer enters the promo code and clicks "Apply"
- System validates the code and shows the discount amount
- Cart totals update to show: Subtotal, Discount (with code name), and Order Total
- Customer can remove the promo code before checkout
- At checkout, the code is re-validated to prevent stale codes
- Discount is saved on the order and invoice records
Promo Code on Invoices
When a promo code is used:
- The order records the coupon code and discount amount
- The invoice records the discount and coupon code
- Invoice PDF (admin and client) shows the discount line with the coupon code
- Payment page shows the discount line in the invoice summary
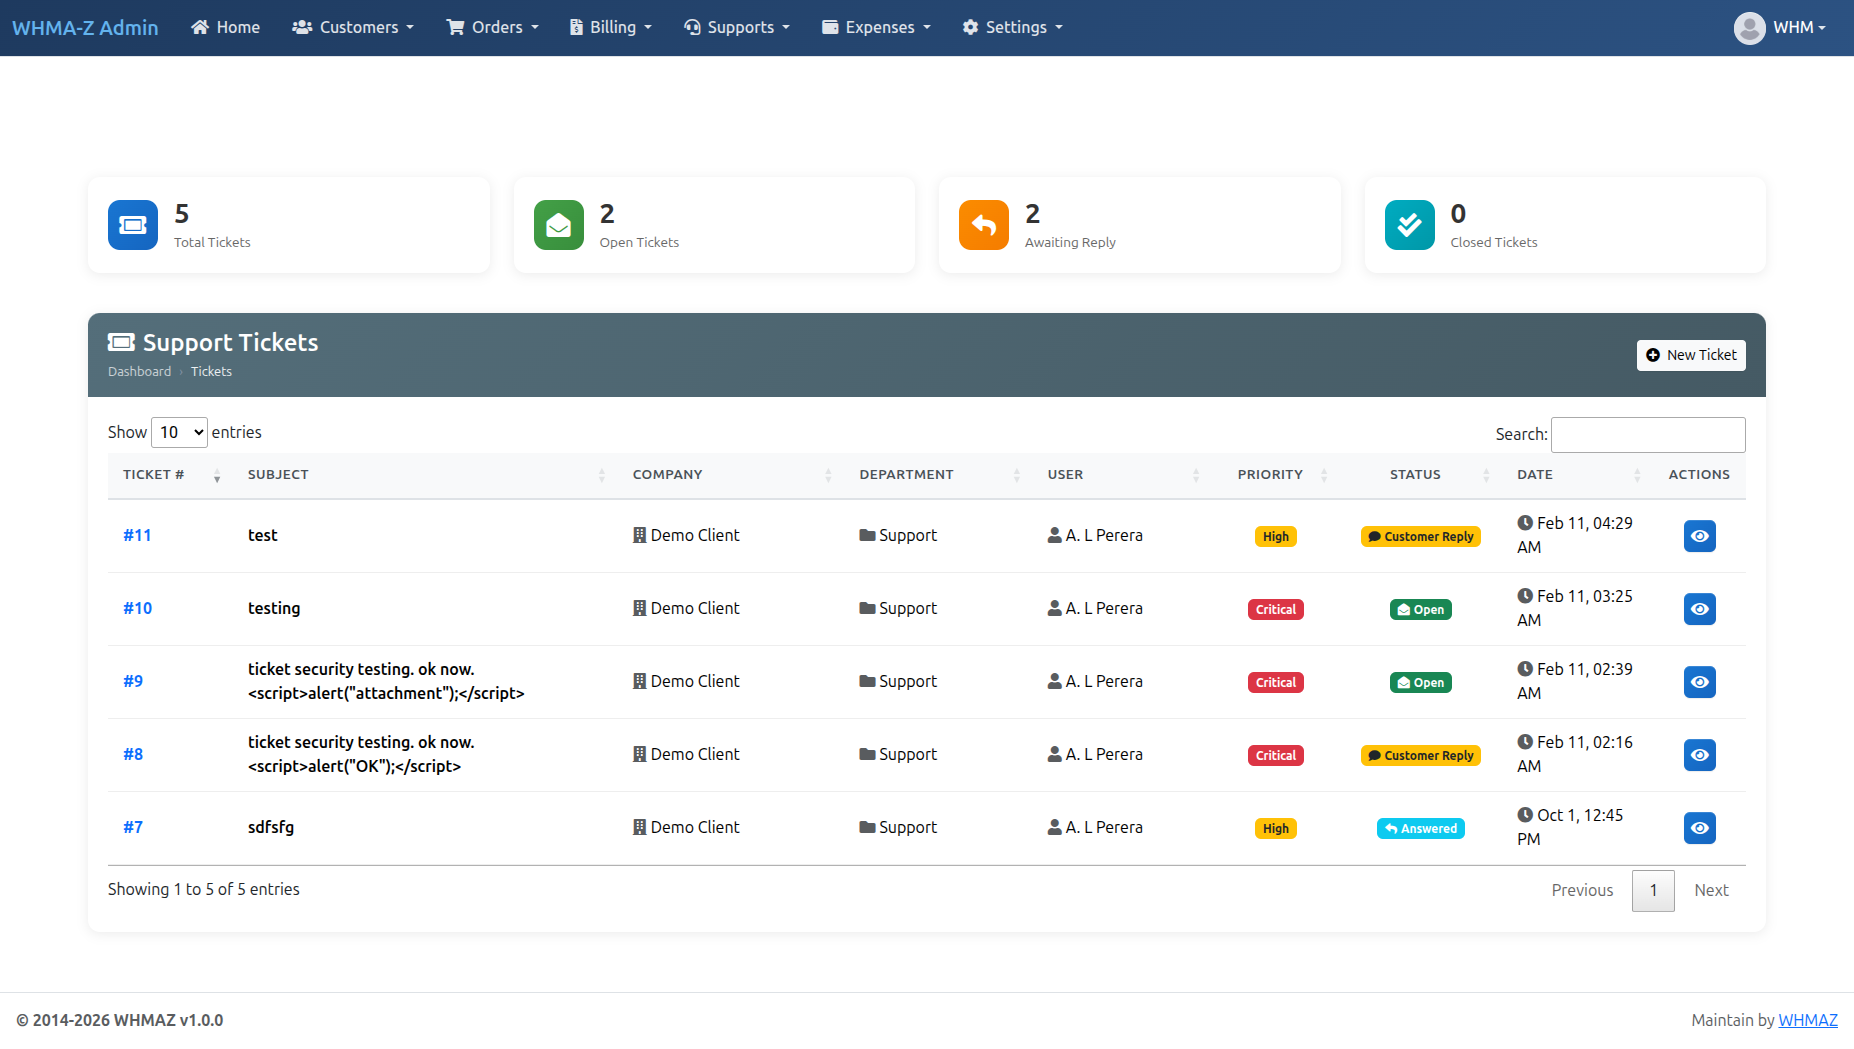
Ticket Management
Ticket List
- Access Ticket Management - Go to "Support" → "Manage Tickets", view all support tickets
- Ticket List Columns - Ticket ID, Customer name, Subject, Department, Priority, Status, Last update, Actions
Viewing and Replying to Tickets
- Open Ticket - Click on ticket from list, view full conversation
- Ticket Details - Customer information, related service, priority level, department, all messages, attached files
- Reply to Customer - Type response, attach files if needed, click "Reply", customer notified via email
- Internal Notes (optional) - Add notes visible only to staff, useful for documentation, not sent to customer
Ticket Assignment
Assigning Tickets: Assign to specific staff member, assign to department, auto-assignment based on department.
- Open ticket
- Select staff member from dropdown
- Save assignment
- Assigned staff notified
Ticket Status Management
Available Statuses:
- Open: New ticket, awaiting response
- Pending: Waiting for customer response
- Answered: Staff replied, awaiting customer
- Resolved: Issue fixed, awaiting closure
- Closed: Ticket closed
Ticket Departments
Managing Departments: Technical Support, Billing Support, Sales, General Inquiry, Custom departments.
Department Settings: Department name, department email, auto-assignment rules, email templates.
Canned Responses
What are Canned Responses? Pre-written reply templates for common questions that save time.
Using Canned Responses:
- While replying to ticket
- Click "Canned Responses" button
- Select appropriate response
- Customize if needed
- Send reply
Managing Canned Responses: Create new responses, edit existing, organize by category, set access permissions.
Knowledge Base Management
Article List
- Access Knowledge Base Management - Go to "Support" → "Knowledge Base", view all articles
- Article Information - Article title, Category, Author, Published date, Status (Published, Draft), Views count
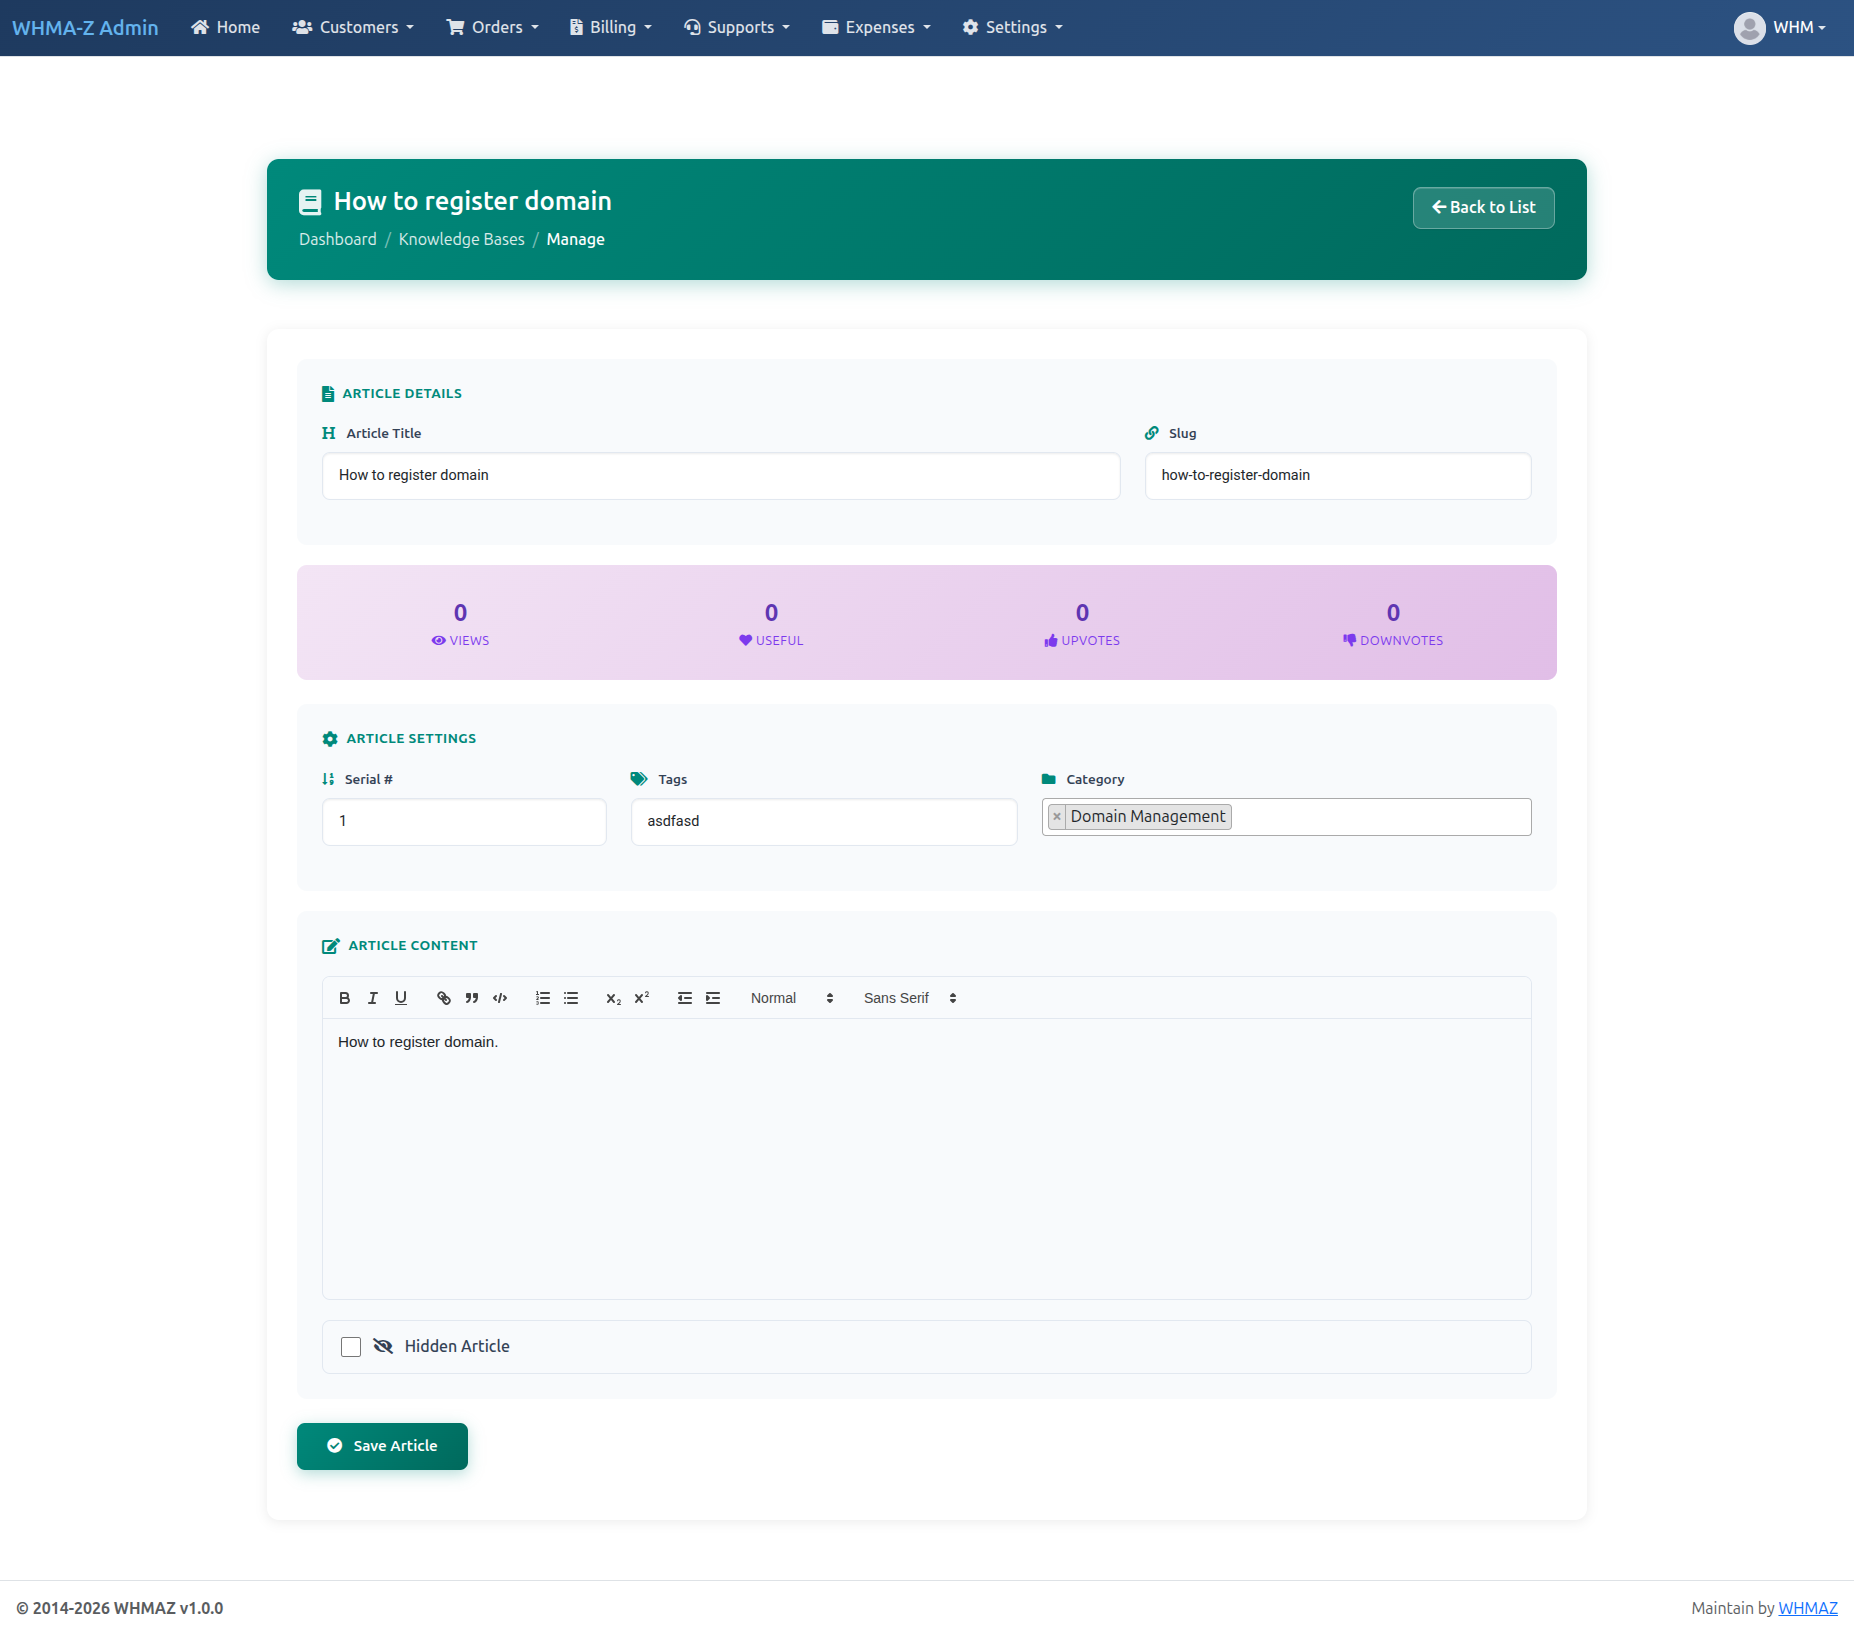
Creating Articles
- Click "New Article" - Open article editor
- Article Details - Title, Category, Summary, Content, Tags, Status, Featured
- Content Editor - Rich text editor (Quill), format text, add images, links, code blocks, preview before publishing
- SEO Settings (optional) - Meta description, keywords, URL slug
- Publish Article - Click "Publish" or "Save as Draft"
Managing Categories
Article Categories: Organize articles by topic, help customers find relevant articles.
Managing Categories:
- Go to "Knowledge Base" → "Categories"
- Create new category
- Set category name and description
- Set display order
- Save category
Common Categories: Getting Started, Account Management, Billing & Payments, Technical Support, Troubleshooting, FAQs
Editing Articles
- Find article, click "Edit"
- Modify content, change category, update content, add/remove images
- Version History (if enabled) - View/restore previous versions
- Save changes, reflected immediately
Article Analytics
Track Article Performance: View count, helpful ratings, search terms, popular articles report.
Using Analytics: Identify knowledge gaps, improve low-rated articles, create content on popular topics.
Announcement Management
Announcement List
- Access Announcements - Go to "Support" → "Announcements", view all announcements
- Announcement Information - Title, Category, Published date, Status (Published, Draft)
Creating Announcements
- Click "New Announcement" - Open announcement form
- Announcement Details
- Title: Announcement headline
- Category: General, Maintenance, New Feature, Service Update
- Content: Full announcement text
- Publish Date: When to display
- Status: Draft or Published
- Notification Options - Send email to all customers, display on customer dashboard, mark as important
- Publish Announcement - Click "Publish", appears in customer portal, email sent (if enabled)
Managing Announcements
Editing: Find announcement, click "Edit", modify content, save changes.
Scheduling: Set future publish date, announcement automatically published on date.
Expiring: Set expiration date (optional), announcement automatically hidden after date.
System Settings
General Settings
Access: whmazadmin/general_setting/manage
The General Settings page allows you to configure all core application settings in one place.
Site Information:
- Site Name: Your website/application name
- Site Description: Brief description
- Admin URL: Custom admin panel URL
- Logo: Upload company logo (JPG, PNG, GIF - Max 2MB)
- Favicon: Upload site favicon (JPG, PNG, GIF, ICO - Max 2MB)
Company Information: Company Name, Company Address, Zip Code
Contact Information: Email, Phone, Fax
SMTP Configuration:
- SMTP Host: Mail server address (e.g., smtp.gmail.com)
- SMTP Port: Usually 587 (TLS) or 465 (SSL)
- SMTP Username: Email account username
- SMTP Auth Key/Password: Email account password or app-specific password
Google reCAPTCHA Configuration:
- reCAPTCHA Site Key: Public site key from Google reCAPTCHA admin
- reCAPTCHA Secret Key: Private secret key from Google reCAPTCHA admin
- Get keys from: https://www.google.com/recaptcha/admin
Company Settings
Access: Settings → Company Settings
Configuration: Company Name, Email, Phone, Address, Tax ID, Website, Logo (displayed on invoices)
Email Configuration
Access: Settings → Email Settings
SMTP Configuration: SMTP Host, SMTP Port, SMTP Username, SMTP Password, Encryption (None/TLS/SSL), From Email, From Name.
Testing Email: Send test email, verify delivery, check spam folder if not received.
Email Templates: Managed via dedicated Email Template Management page. See Email Template Management for full details.
Invoice Settings
Access: Settings → Invoice Settings
Configuration: Invoice Prefix, Next Invoice Number, Tax Name, Tax Rate, Tax Inclusive, Invoice Due Days, Late Fee, Payment Terms.
Currency Settings
Access: Settings → Currency Settings
Managing Currencies: Add currencies, set symbol and code, set default currency, set exchange rates, enable/disable currencies.
Security Settings
Access: Settings → Security Settings
Configuration: Session Timeout, Password Requirements (minimum length, uppercase, numbers, symbols), Login Attempts, Lockout Duration, Two-Factor Authentication, IP Whitelist.
Automation Settings
Access: Settings → Automation
Database Table: sys_cnf (group: AUTOMATION)
| Setting | Description | Default |
|---|---|---|
cron_enabled | Enable/disable all cron jobs | 1 (enabled) |
invoice_generation_days_before | Days before expiry to generate invoice | 7 |
payment_reminder_first | First reminder (days before due) | 3 |
payment_reminder_second | Second reminder (days before due) | 1 |
payment_reminder_overdue | Overdue reminder (days after due) | 3 |
suspension_days_after_due | Days after due to suspend service | 5 |
cancellation_days_after_suspension | Days after suspension to cancel | 30 |
domain_reminder_first | First domain reminder (days before expiry) | 30 |
domain_reminder_second | Second domain reminder | 15 |
domain_reminder_third | Third domain reminder | 7 |
Cron Job Command:
php /path/to/whmaz/index.php cron/runSet to run every hour or as needed.
Feature Flags
Access: Settings → Features
Database Table: sys_cnf (group: FEATURES)
| Setting | Description | Default |
|---|---|---|
feature_customer_registration | Allow new customer registration | 1 (enabled) |
feature_domain_registration | Enable domain registration features | 1 (enabled) |
feature_support_tickets | Enable support ticket system | 1 (enabled) |
feature_knowledge_base | Enable knowledge base | 1 (enabled) |
feature_announcements | Enable announcements system | 1 (enabled) |
feature_affiliate_system | Enable affiliate/referral system | 0 (disabled) |
feature_two_factor_auth | Enable two-factor authentication | 0 (disabled) |
feature_social_login | Enable social login (Google, Facebook) | 0 (disabled) |
Notification Settings
Access: Settings → Notifications
Database Table: sys_cnf (group: NOTIFICATIONS)
| Setting | Description | Default |
|---|---|---|
admin_notification_email | Email for admin notifications | admin@yourcompany.com |
notify_admin_new_order | Notify on new order | 1 (enabled) |
notify_admin_new_ticket | Notify on new support ticket | 1 (enabled) |
notify_admin_new_customer | Notify on new customer registration | 1 (enabled) |
notify_admin_payment | Notify on payment received | 1 (enabled) |
Customer Portal Settings
Access: Settings → Customer Portal
Database Table: sys_cnf (group: PORTAL)
| Setting | Description | Default |
|---|---|---|
allow_customer_registration | Allow self-registration | 1 (enabled) |
email_verification_required | Require email verification | 1 (enabled) |
default_account_status | New account status | active |
dashboard_show_services | Show services widget | 1 (enabled) |
dashboard_show_invoices | Show invoices widget | 1 (enabled) |
dashboard_show_tickets | Show tickets widget | 1 (enabled) |
dashboard_show_announcements | Show announcements widget | 1 (enabled) |
Support System Settings
Access: Settings → Support
Database Table: sys_cnf (group: SUPPORT)
| Setting | Description | Default |
|---|---|---|
default_ticket_department | Default department for new tickets | General Support |
ticket_departments | Available departments (comma-separated) | Technical Support,Billing Support,Sales,General Inquiry |
ticket_priorities | Priority levels (comma-separated) | Low,Medium,High,Urgent |
auto_close_tickets_after | Auto-close resolved tickets (days) | 7 |
notify_customer_ticket_reply | Notify customer on staff reply | 1 (enabled) |
ticket_attachments_enabled | Allow file attachments | 1 (enabled) |
ticket_max_attachment_size | Max attachment size (KB) | 5120 |
Configuration Storage Overview
WHMAZ stores configuration in the database for easy management via Admin Portal:
| Configuration Type | Database Table | Admin Location |
|---|---|---|
| Company Information | app_settings | Settings → General |
| Google reCAPTCHA | app_settings | Settings → General |
| Payment Gateways | payment_gateway | Settings → Payment Gateways |
| Email Templates | email_templates | Settings → Email Templates |
| Domain Registrar | dom_registers | Settings → Domain Registrar |
| Billing Settings | sys_cnf | Settings → Billing |
| Automation/Cron | sys_cnf | Settings → Automation |
| Feature Flags | sys_cnf | Settings → Features |
| Notifications | sys_cnf | Settings → Notifications |
| Customer Portal | sys_cnf | Settings → Customer Portal |
| Support System | sys_cnf | Settings → Support |
Environment File (.env): Only contains server-specific settings: Database credentials, Encryption key, Session configuration, Environment mode (development/production).
Part 4: Advanced Features
Email Configuration
SMTP Setup
Recommended SMTP Providers:
- Gmail (Google Workspace)
- SendGrid
- Amazon SES
- Mailgun
- Your web host's SMTP server
Gmail SMTP Configuration
Settings:
SMTP Host: smtp.gmail.com
SMTP Port: 587
Encryption: TLS
Username: your-email@gmail.com
Password: Your App Password (not regular password)
Important: Enable "Less Secure App Access" or use App Password
SendGrid Configuration
Settings:
SMTP Host: smtp.sendgrid.net
SMTP Port: 587
Encryption: TLS
Username: apikey
Password: Your SendGrid API Key
Testing Email Delivery
- Go to Settings → Email Settings
- Click "Send Test Email"
- Enter test email address
- Click "Send"
- Check inbox (and spam folder)
- Verify email received correctly
Troubleshooting Email Issues
Emails Not Sending:
- Check SMTP credentials
- Verify SMTP port and encryption
- Check firewall/server blocks port 587 or 465
- Enable less secure apps (Gmail)
- Check email logs
Emails Going to Spam:
- Set up SPF record
- Set up DKIM signing
- Set up DMARC policy
- Use business email (not Gmail/Yahoo)
- Ensure reverse DNS is set
Payment Gateway Setup
Gateway Status Overview
| Gateway | Status | Description |
|---|---|---|
| Stripe | Fully Working | Complete integration with PaymentIntent API and webhook support |
| SSLCommerz | Fully Working | Full integration with automatic session restoration for external redirects |
| Bank Transfer | Working | Manual payment recording |
Payment Notification Emails
When a payment is successfully processed, the system automatically sends email notifications:
| Recipient | Template | Configurable | |
|---|---|---|---|
| Payment Confirmation | Customer | invoice_payment_confirmation | Always sent |
| Payment Notification | Admin | admin_payment_notification | Settings → Notifications |
What triggers payment emails:
- Successful payment via Stripe (webhook:
payment_intent.succeeded) - Successful payment via SSLCommerz (IPN callback)
- Manual payment recording by admin
To customize payment emails:
- Go to Admin → Settings → Email Templates
- Search for "payment" templates
- Edit subject and body as needed
- Use placeholders for dynamic content
Stripe Configuration
- Create Stripe Account - Go to stripe.com, sign up, complete business verification
- Get API Keys - Go to Developers → API Keys, copy Publishable Key (
pk_) and Secret Key (sk_) - Configure Webhook (Required)
- Go to Developers → Webhooks in Stripe Dashboard
- Click "Add endpoint"
- Enter Webhook URL:
https://yourdomain.com/webhook/stripe - Select events:
payment_intent.succeeded,payment_intent.payment_failed,checkout.session.completed,charge.refunded - Copy the "Signing secret" (
whsec_)
- Configure in WHMAZ
- Go to Admin → Settings → Payment Gateways
- Click "Configure" on Stripe
- Test Mode: Toggle ON for testing, OFF for live
- Enter test or live credentials (Public Key, Secret Key, Webhook Secret)
- Enable the gateway and Save
- Test Payment - Use test card:
4242 4242 4242 4242, any future expiry, any 3-digit CVC
Stripe Test Cards:
| Card Number | Description |
|---|---|
| 4242 4242 4242 4242 | Successful payment |
| 4000 0000 0000 0002 | Card declined |
| 4000 0000 0000 9995 | Insufficient funds |
SSLCommerz Configuration (Bangladesh)
- Create SSLCommerz Account - Go to sslcommerz.com, sign up for merchant account, complete verification
- Get API Credentials - Login to Merchant Panel, go to Developers → API Credentials, copy Store ID and Store Password
- Configure IPN (Webhook) - IPN URL:
https://yourdomain.com/webhook/sslcommerz - Configure in WHMAZ - Go to Admin → Settings → Payment Gateways, configure SSLCommerz, enter Store ID and Store Password, enable and Save
- Test Payment - Enable Sandbox Mode, create test invoice with BDT currency, complete payment using sandbox credentials
Note: SSLCommerz uses external redirect flow. The system handles session restoration automatically using secure payment tokens.
Bank Transfer
Setup: Enable Bank Transfer payment method, add bank account details, instructions displayed to customers.
Instructions Template:
Bank Transfer Instructions:

Bank Name: [Your Bank Name]
Account Name: [Your Company Name]
Account Number: [Account Number]
Routing Number: [Routing Number]
SWIFT/BIC: [For international transfers]

Reference: Please include your invoice number as reference
Manual Processing: Customers transfer funds, notify you or upload proof, you verify payment, manually mark invoice as paid.
Domain Registrar Integration
Supported Registrars
| Registrar | Platform | API Type | Status |
|---|---|---|---|
| ResellerClub | resellerclub | JSON REST | Supported |
| Resell.biz | resellbiz | JSON REST | Supported |
| Namecheap | namecheap | XML | Supported |
Default Registrar System
WHMAZ uses a default registrar system:
- Set one registrar as "Default" in admin panel
- All domain operations use the default registrar
- When you set a registrar as default, others are automatically unset
- Navigate to: Admin → Settings → Domain Registrars
Resell.biz / ResellerClub Setup
Prerequisites: ResellerClub reseller account, API credentials, funded account.
Configuration Steps:
- Get API Credentials - Login to control panel, go to Settings → API, note auth-userid and API key
- Configure in WHMAZ - Go to Admin → Settings → Domain Registrars, enter API Base URL:
https://httpapi.com/api/domains/, enter auth-userid and API key, check "Set as Default" - Whitelist Server IP - In ResellerClub control panel, go to Settings → API → IP Whitelist, add your server's IP
- Test Domain Search - Go to customer portal, use domain search, verify results return correctly
Namecheap Setup
Prerequisites: Namecheap reseller account, API credentials, funded account, server IP whitelisted.
Configuration Steps:
- Get API Credentials - Login to Namecheap dashboard, go to Profile → Tools → API Access, enable API access, note Username and Key
- Whitelist Server IP - In Namecheap dashboard → Profile → Tools → API Access, add your server's IP
- Configure in WHMAZ
- Set Platform:
NAMECHEAP - Set API Base URL:
https://api.namecheap.com/xml.response(production) orhttps://api.sandbox.namecheap.com/xml.response(sandbox) - Enter API Username and Key
- Check "Set as Default"
- Set Platform:
- Test Domain Search - Go to customer portal, verify results
Namecheap-Specific Notes:
- Namecheap uses XML API (not JSON)
- Domain suggestions check common TLDs (.com, .net, .org, .io, .co)
- Contact info is passed with each request (no separate customer/contact IDs)
General Troubleshooting
"Sorry, you have been blocked" / 403 Error: API IP whitelist issue, whitelist your server IP in registrar panel, verify API credentials.
No Results Returned: Check API URL, verify credentials, check server can make external CURL requests, review error logs at src/logs/.
Domain Not Registering: Verify account funded, check domain availability, verify customer details complete, check extension supported.
Adding Domain Extensions
- Check Supported TLDs - Review registrar's supported TLDs
- Add to Database - Insert into
dom_extensionstable, set extension name, set status to active - Configure Pricing - Go to Domain Pricing management, add pricing for new extension
- Test in Portal - Search for domain with new extension, verify pricing displays correctly
Automation & Cron Jobs
Setting Up Cron Jobs
Required Cron Jobs:
- Invoice Generation - Generates renewal invoices before due date. Daily.
php /path/to/whmaz/index.php cron/generate_invoices - Payment Reminders - Sends reminder emails for unpaid invoices. Daily.
php /path/to/whmaz/index.php cron/payment_reminders - Service Suspension - Suspends services with overdue invoices. Daily.
php /path/to/whmaz/index.php cron/suspend_services - Domain Expiry Reminders - Reminds customers of upcoming expirations. Daily.
php /path/to/whmaz/index.php cron/domain_reminders
cPanel Cron Setup
- Access Cron Jobs - Login to cPanel, find "Cron Jobs" icon
- Add New Cron Job - Select frequency (e.g., daily at 3:00 AM), enter command:
Save cron job.php /home/username/public_html/index.php cron/generate_invoices - Repeat for Each Cron Task - Add separate cron jobs, stagger times to avoid overload
Linux Server Cron Setup
- Edit Crontab
crontab -e - Add Cron Entries
# Invoice generation - Daily at 3:00 AM 0 3 * * * php /var/www/html/whmaz/index.php cron/generate_invoices # Payment reminders - Daily at 9:00 AM 0 9 * * * php /var/www/html/whmaz/index.php cron/payment_reminders # Service suspension - Daily at 11:00 AM 0 11 * * * php /var/www/html/whmaz/index.php cron/suspend_services # Domain reminders - Daily at 10:00 AM 0 10 * * * php /var/www/html/whmaz/index.php cron/domain_reminders - Save and Exit - Press Ctrl+X, then Y, then Enter (in nano)
Verifying Cron Execution
Check Cron Logs:
tail -f /var/log/syslog | grep CRONCheck Application Logs: View logs in application/logs/ directory, look for cron execution entries, verify no errors.
Customization Options
Changing Logo
- Prepare Logo File - Format: PNG or JPG, recommended size: 200x50 pixels, transparent background (PNG)
- Upload Logo - Go to Settings → Company Settings, click "Upload Logo", select file, save changes
- Logo Usage - Displayed on invoices, customer portal header, admin portal header, emails
Customizing Colors/Theme
CSS Customization: Main CSS file: resources/css/custom.css. Modify colors, fonts, spacing. Use browser inspector to find CSS selectors.
Common Customizations:
/* Primary color */
.btn-primary {
    background-color: #your-color;
}

/* Header background */
.header {
    background-color: #your-color;
}

/* Links */
a {
    color: #your-color;
}
Customizing Email Templates
- Access Email Template Management - Go to Admin Portal → "Settings" → "Email Templates" or navigate to
whmazadmin/email_template - Edit Template - Click "Manage" on the template, use Quill editor, use placeholders, save changes
- Create New Template - Click "Add", assign unique template key, category, subject, and body
- Test Email - Send test email, verify formatting, check all placeholders replaced correctly
Adding Custom Pages
Creating Custom Page:
- Create Controller - File:
application/controllers/Custom_page.php, extend appropriate base controller - Create View - File:
application/views/custom_page.php, add your HTML content - Add to Menu (optional) - Edit navigation menu file, add link to custom page
Part 5: Troubleshooting & FAQ
Common Issues
Issue: Cannot Login to Admin Panel
Possible Causes: Incorrect email or password, account suspended or deleted, session expired, browser cache issues.
Solutions:
- Verify email and password correct
- Use "Forgot Password" to reset
- Clear browser cache and cookies
- Try different browser
- Check database for user account status
Issue: Blank White Page
Possible Causes: PHP error, missing files, insufficient permissions, memory limit exceeded.
Solutions:
- Check error logs in
application/logs/ - Enable error display temporarily: Set
ENVIRONMENTto 'development' inindex.php - Check file permissions (755 for directories, 644 for files)
- Increase PHP memory_limit in php.ini
- Contact server administrator
Issue: 404 Error on Pages
Possible Causes: .htaccess file missing or incorrect, mod_rewrite not enabled, base URL not configured correctly.
Solutions:
- Verify .htaccess exists in root directory
- Check .htaccess content:
RewriteEngine On RewriteCond %{REQUEST_FILENAME} !-f RewriteCond %{REQUEST_FILENAME} !-d RewriteRule ^(.*)$ index.php/$1 [L] - Verify mod_rewrite enabled on server
- Check base_url in
application/config/config.php
Issue: Database Connection Error
Possible Causes: Incorrect database credentials, database server down, firewall blocking connection, database not created.
Solutions:
- Verify credentials in
application/config/database.php - Test database connection:
mysql -u username -p database_name - Check database server is running
- Verify database exists
- Check user has permissions on database
Issue: Emails Not Sending
Possible Causes: SMTP settings incorrect, SMTP port blocked, authentication failed, email provider blocks.
Solutions:
- Verify SMTP settings in Settings → Email
- Send test email and check error
- Try different SMTP port (587, 465, 25)
- Check server firewall allows outbound on SMTP port
- Enable "less secure apps" if using Gmail
- Check email logs for specific errors
Issue: Payment Gateway Not Working
Possible Causes: API credentials incorrect, gateway in test mode, SSL certificate issues, account not verified.
Solutions:
- Verify API credentials
- Check test/live mode setting
- Ensure site uses HTTPS (SSL)
- Verify gateway account approved and active
- Check gateway logs for specific errors
- Test with different payment gateway
Issue: Domain Search Not Working
Possible Causes: API credentials incorrect, IP not whitelisted, API URL incorrect, no domain pricing configured.
Solutions:
- Verify API credentials in database (domain_register table)
- Contact registrar to whitelist server IP
- Check API URL format correct
- Verify pricing exists for searched extensions
- Check CURL enabled on server
- Review error logs
Issue: Slow Performance
Possible Causes: Server resources limited, database not optimized, too many plugins/modules, large log files.
Solutions:
- Enable OPcache
- Optimize database tables
- Increase PHP memory_limit
- Clear old log files
- Enable caching
- Upgrade server resources
- Use CDN for static assets
Frequently Asked Questions
General Questions
Q: Can I use WHMAZ for other types of businesses besides hosting?
A: Yes, while designed for hosting providers, WHMAZ can be adapted for any service-based business that needs customer management, billing, and support.
Q: Does WHMAZ support multiple currencies?
A: Yes, you can configure multiple currencies and set exchange rates.
Q: Can I customize the look and feel?
A: Yes, you can customize CSS, logos, colors, and email templates.
Q: Is WHMAZ mobile-friendly?
A: Yes, both customer and admin portals are fully responsive and work on mobile devices.
Q: Can I import customers from another system?
A: Currently manual import. You can insert directly into database with proper SQL knowledge, or contact support for assistance.
Billing Questions
Q: How do I set up recurring billing?
A: Configure cron jobs for automatic invoice generation. Set up payment gateway for auto-payments (if supported).
Q: Can I offer discounts or coupons?
A: Coupon functionality may need custom development. You can manually adjust invoice amounts.
Q: How do I handle taxes?
A: Configure tax rate in Settings → Invoice Settings. Tax applies to all invoices.
Q: Can I accept payments in multiple currencies?
A: Yes, configure multiple currencies in Settings → Currency.
Q: How do I issue refunds?
A: Process refund through payment gateway, then record in WHMAZ or cancel invoice.
Domain Questions
Q: Which domain registrars are supported?
A: ResellerClub, Resell.biz, and Namecheap are fully supported. Set one as the "Default" registrar in Admin → Settings → Domain Registrars.
Q: Can customers transfer domains to me?
A: Yes, domain transfer functionality is included.
Q: Do domains auto-renew?
A: Renewal invoices are generated automatically. Payment must be made (auto-payment depends on gateway).
Q: How do I set domain pricing?
A: Go to Domains → Domain Pricing in admin panel.
Support Questions
Q: Can I have multiple support departments?
A: Yes, create departments in ticket settings.
Q: Can customers reply to tickets via email?
A: Email-to-ticket functionality requires additional configuration (pipe to email).
Q: How do I create canned responses?
A: Go to Support → Canned Responses in admin panel.
Q: Can I assign tickets to specific staff?
A: Yes, assign tickets to staff members from ticket details page.
Technical Questions
Q: What are the server requirements?
A: PHP 8.2+, MySQL 5.7+, Apache/Nginx. See README.md for complete requirements.
Q: Can I run WHMAZ on shared hosting?
A: Yes, as long as server meets minimum requirements.
Q: Is the source code encrypted?
A: No, full source code is provided and can be customized.
Q: Can I use WHMAZ on multiple domains?
A: Regular license: One domain. Extended license: Multiple under one business/SaaS.
Q: How do I backup WHMAZ?
A: Backup database (MySQL dump) and files (entire directory). See INSTALLATION.md for commands.
Getting Support
Support Channels
Documentation:
- README.md - Overview and quick start
- INSTALLATION.md - Installation guide
- USER_GUIDE.md - This document
- CHANGELOG.md - Version history
Email Support:
- Email: support@whmaz.com
- Response time: Within 48 hours (business days)
- Include: Order ID, version, detailed description, screenshots
Knowledge Base: Search for common issues, step-by-step guides, video tutorials (if available).
Community Forum (if available): Ask questions, share solutions, connect with other users.
Before Contacting Support
Information to Provide:
- WHMAZ Version: Check in footer or about page
- Server Environment:
- PHP version:
php -v - MySQL version:
mysql --version - Server OS: Linux, Windows, etc.
- PHP version:
- Detailed Description: What were you trying to do? What happened instead? Error messages (exact text)
- Screenshots: Error page, relevant configuration pages, console errors (F12 in browser)
- Steps to Reproduce: Step 1, Step 2, Step 3... Helps support team replicate issue
Support Limitations
Support Includes: Installation assistance (guidance, not service), configuration help, bug fixing, feature usage questions, troubleshooting.
Support Does NOT Include: Custom development, server management, third-party plugin support, training sessions, consulting services.
These services available separately at additional cost.
Support Period
- Included: 6 months from purchase date
- Extended Support: Available for purchase
- Lifetime Updates: Check license terms
Conclusion
Thank you for using WHMAZ!
This guide covered:
- Customer portal usage
- Administrator functions
- Advanced configuration
- Troubleshooting common issues
Next Steps:
- Complete initial configuration
- Create first customer and order
- Test billing and payment flow
- Configure automation/cron jobs
- Customize branding and emails
- Train staff on admin functions
- Create knowledge base articles for customers
Need Help?
- Email: support@whmaz.com
- Documentation: See other guides
- Website: https://whmaz.com/
Stay Updated:
- Check CHANGELOG.md for new features
- Subscribe to announcements
Document Information:
Version: 1.0.0 | Last Updated: February 18, 2026
Product: WHMAZ - Web Host Manager A to Z Solutions. Lightweight Domain Hosting Management System
Copyright 2026 WHMAZ. All Rights Reserved.